Crochet Headband with 3D Flower Design Pattern
Crochet Headband with 3D Flower Design Pattern
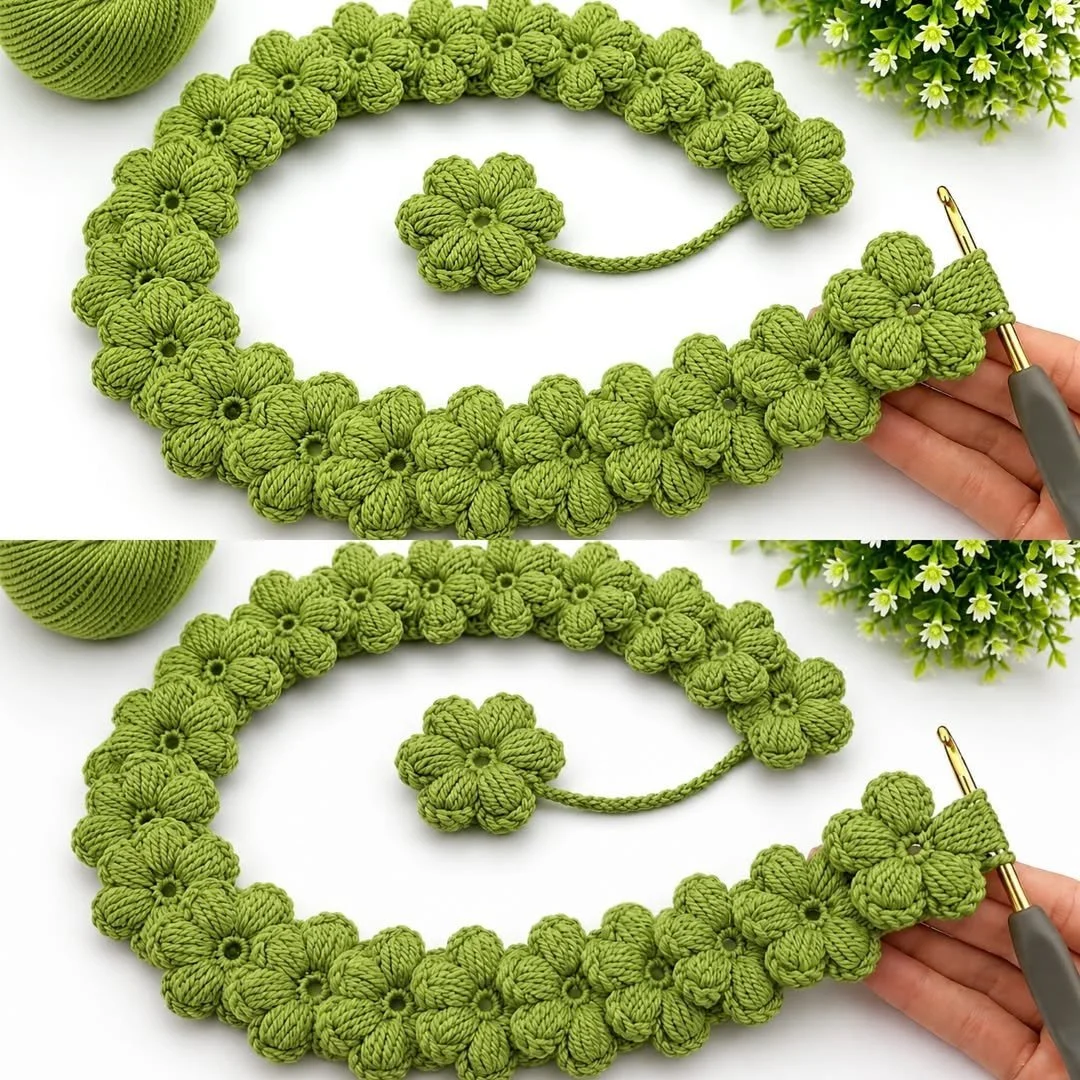
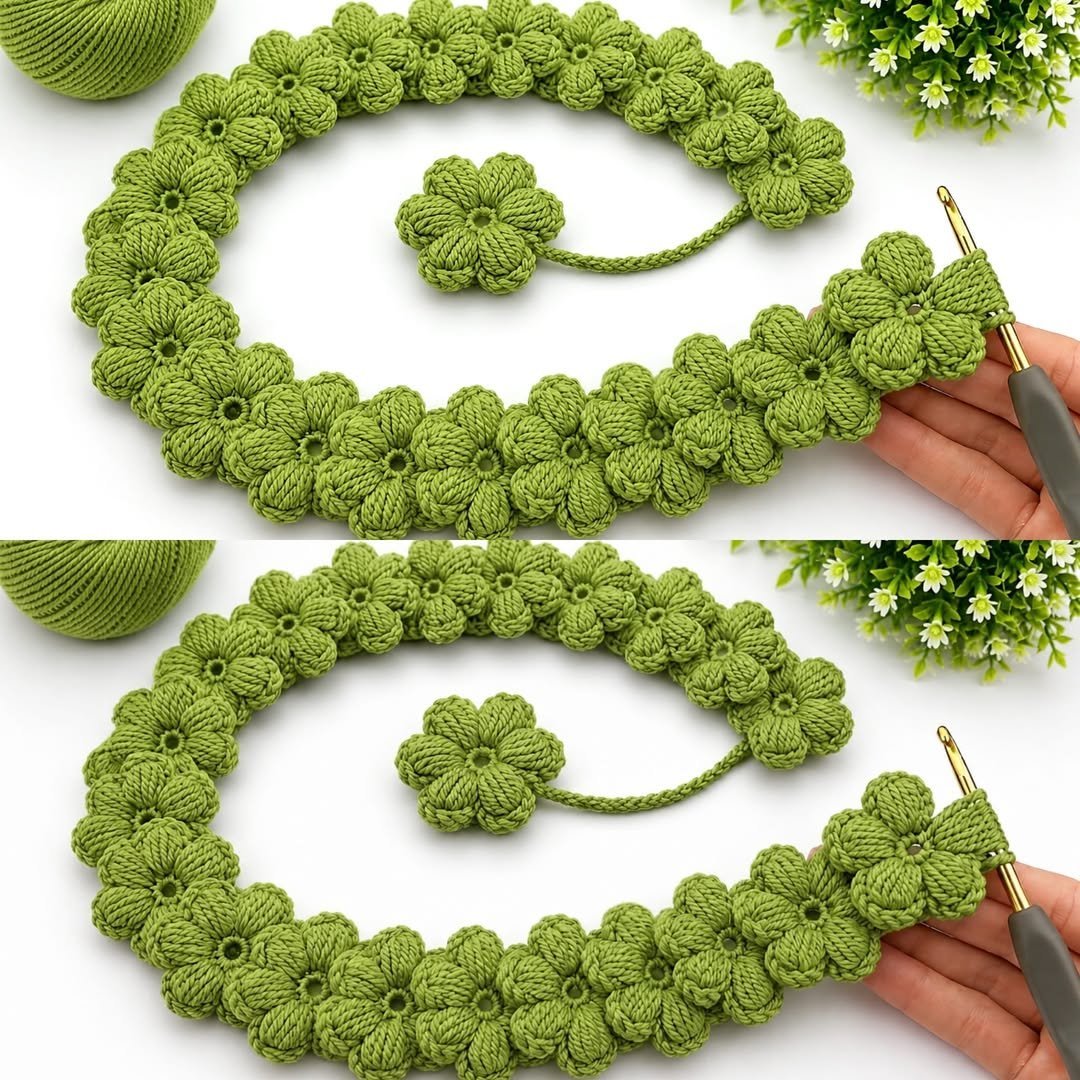
Crochet lovers, welcome! Today, we’re diving into the delightful world of a 3D crochet flower headband. This project will help you learn essential crochet techniques while allowing you to express your creativity. By the end of this tutorial, you will confidently construct a unique headband that adds charm and flair to any outfit.
Project Plan
The 3D crochet flower headband consists of two main components: the headband base and the decorative 3D flowers. Here’s the order in which you’ll work on these components:
- Crochet the Band: Create a flat base using single or double crochet stitches.
- Create the Flowers: Crochet multiple flowers using your chosen floral pattern. These can vary in size and color for a more dynamic appearance.
- Assemble the Headband: Attach the flowers to the headband base securely and neatly.
- Finishing Touches: Weave in any loose ends and optionally add embellishments or edging.
Materials and Tool Selection
To successfully make your crochet headband, gather the following materials:
Verified Materials
- Yarn: Soft, durable yarn such as cotton or acrylic is recommended. Cotton yarn is ideal for summer accessories due to its breathability, while acrylic provides a wide range of colors and durability.
- Crochet Hook: A hook size between 4mm and 5mm is generally suitable for worsted-weight yarn.
- Scissors: For trimming yarn ends.
- Tapestry Needle: Essential for weaving in yarn ends and sewing components together.
- Measuring Tape: To ensure the headband fits comfortably.
Suggested Alternatives
- Consider using wool or a wool-blend yarn if you’re making this headband for cooler weather.
- Think about adding decorative embellishments like beads or sequins to your flowers for added sparkle.
Assessing Your Materials
Before you begin, it’s a good practice to make a small gauge swatch using your chosen yarn and hook. This will help you determine if you are achieving the intended fabric density and stitch definition. Aim for a swatch of about 4"x4" (10cm x 10cm) and calculate your rows and stitches per inch.
Terminology and Techniques
It’s essential to understand the basic crochet terminology before progressing with this project. Here are some commonly used abbreviations:
- ch: Chain
- sc: Single Crochet
- dc: Double Crochet
- sl st: Slip Stitch
- Rnd: Round
- fpsc: Front Post Single Crochet
- bpdc: Back Post Double Crochet
Basic Stitches Explained
-
Chain Stitch (ch): Begin with a slip knot on your hook. Yarn over (yo), pull through the loop on the hook, creating a chain. Each time you perform this action, you add one chain stitch.
-
Single Crochet (sc): Insert the hook into the stitch, yarn over, pull up a loop (2 loops on hook), yarn over again, and pull through both loops on the hook.
-
Double Crochet (dc): Yarn over, insert the hook into the stitch, yarn over again and pull up a loop (3 loops on hook), yarn over and pull through the first 2 loops (2 loops remain), yarn over again and pull through the last 2 loops.
-
Slip Stitch (sl st): Insert the hook into the stitch, yarn over, and pull both the yarn and the loop through. This creates a tight connection and is often used to join rounds.
Measurements and Preparation
Your headband should be snug yet comfortable. Here’s how to measure:
- Head Circumference: Using a measuring tape, measure around your head where you would like the headband to sit.
- Yarn Swatch: After creating your yarn swatch, take note of how many rows and stitches equal 4 inches to help determine your chain length for your headband.
When working with different yarns, remember that their stretch and drape may affect sizing. Adjust your working chain accordingly.
Detailed Working Method
Stage 1: Create the Band
-
Foundation Chain: Start with a chain that corresponds to the head measurement. For example, if your head measures 20 inches, chain a number that represents this measurement (keep in mind it should have some stretch).
-
Row 1: Begin your first row with single crochet stitches. Insert your hook into the second chain from the hook for the first stitch. Continue working each stitch until you reach the end of the row. You should have completed an even number of stitches based on your chain.
-
Row 2: Turn your work, chain 1 (does not count as a stitch) and single crochet across. Continue until the piece is wide enough; typically, this can be around 2 to 4 inches depending on the look you want for the band.
-
End Condition: Once you reach your desired width, fasten off and leave a long tail for sewing.
Visual Checkpoint
You should have a flat, rectangular band that fits snugly but not tightly.
Stage 2: Create the Flowers
-
Flower Base: Start with a magic ring or chain 4, join into a circle.
-
Round 1: In the ring, create 10 single crochets (sc) or double crochets (dc), depending on the flower. Pull the ring tight.
-
Round 2: Work a series of increases by crocheting two stitches into each stitch around (20 stitches).
-
Subsequent Rounds: Add rounds as desired for depth, using a combination of puff stitches or bobbles to create a 3D effect.
-
Finish & Secure: Fasten off each flower and weave in ends.
-
Visual Checkpoint: The flower should have a defined and bold 3D appearance with every petal distinct.
Stage 3: Assembly
-
Position the Flowers: Lay out your flowers on the band without sewing them to finalize their placement. Ensure there’s adequate spacing and balance.
-
Sewing: Use the tapestry needle and the yarn tail to securely attach each flower. Sew through the base of the petals connecting to the headband without pulling too tightly.
-
Final Fit Check: Try the headband on to ensure comfort and that the flowers are appropriately aligned.
Stage 4: Finishing Touches
-
Weave in Ends: Use the tapestry needle to weave in loose ends from the flowers and band.
-
Optional Edge: If desired, add an edging using a contrasting color. Use a shell stitch or picot border for a decorative finish.
-
Blocking (Optional): Lightly block your headband to shape it, enhancing the neatness and appearance.
Troubleshooting
| Symptom | Likely Cause | Practical Correction |
|—————————–|———————————–|——————————————|
| Band is too tight or loose | Incorrect foundation chain length | Measure again and adjust starting chain |
| Flowers shifting or falling | Insufficient attachment | Reinforce sewing points; use more stitching |
| Yarn is fraying or pilling | Poor quality or incorrect fiber | Opt for a higher quality yarn, check label |
| Design feels flat | Not using 3D stitches or shaping | Incorporate puff stitches or bobbles |
Variations, Care, and FAQ
Variations
- Flower Types: Use different flower designs, such as daisies or even abstract florals for variety.
- Color Adjustments: Try a gradient effect or seasonal palettes for different occasions.
- Embellishments: Add beads or buttons for additional texture.
Care Instructions
- Washing: Hand wash with cold water and mild soap. Avoid machine washing.
- Drying: Lay the headband flat to dry and reshape flowers as necessary.
- Storage: Keep in a cool, dry place away from direct sunlight.
FAQ
-
Can I mix different yarns?
Yes, but ensure they have similar weight and care instructions for consistency. -
How can I make it adjustable?
Consider adding a button or elastic closure for a fit that can accommodate various head sizes. -
Can I use different stitches for the flowers?
Absolutely, get creative with various textures and styles for your flowers. -
Is this headband suitable for all seasons?
Yes! With thoughtful yarn and color choices, this headband can be worn year-round.
Completion Checklist
- [ ] Band size confirmed
- [ ] Flowers crocheted and attached securely
- [ ] Ends woven in
- [ ] Optional embellishments added
Happy crocheting! Your 3D flower headband is sure to turn heads and be a rewarding project to showcase your talents. Enjoy!