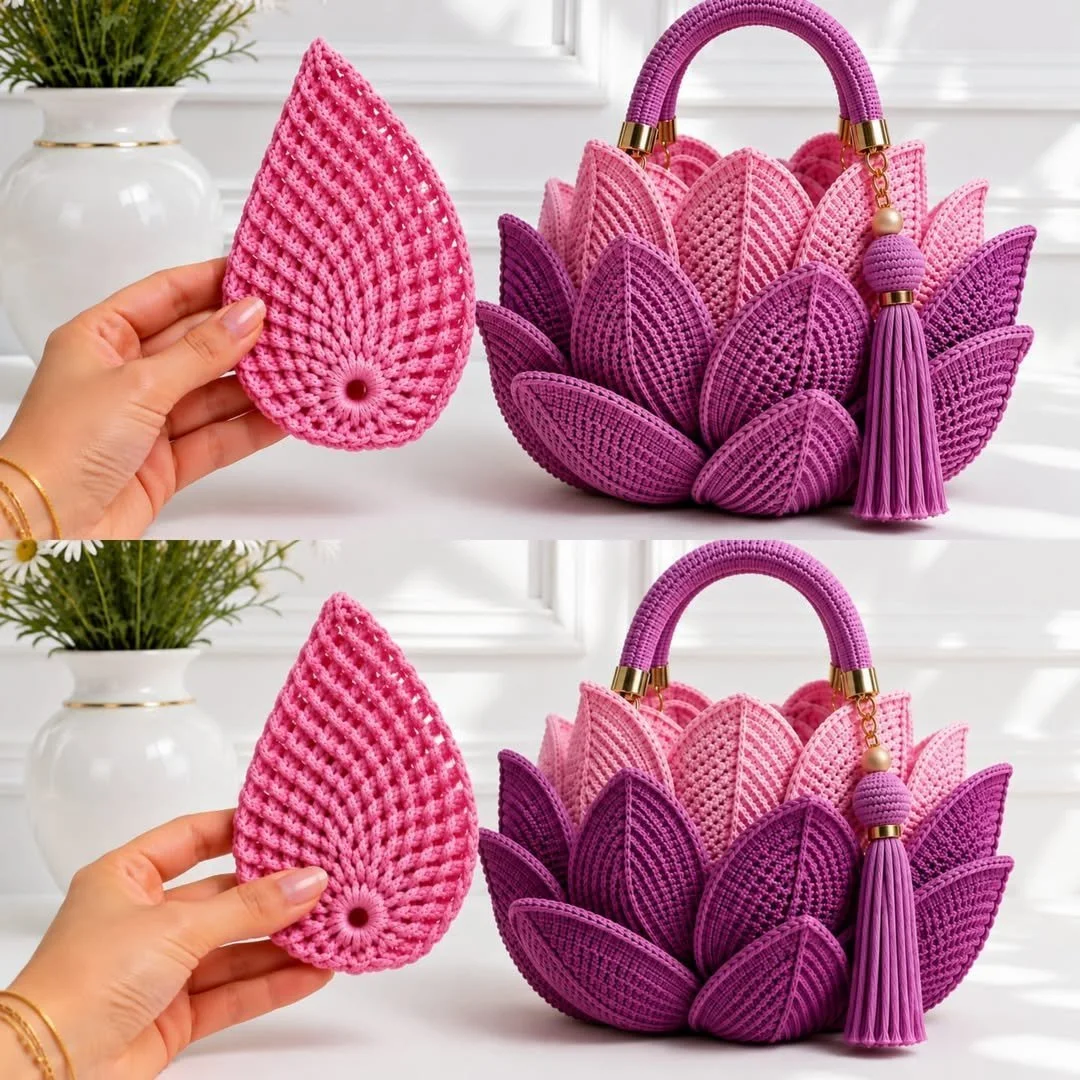
Crochet Lotus Flower & Leaf Bag: An Elegant Accessory
Don’t Miss This! 🌸 How to Crochet a Lotus Flower & Leaf Bag | Easy Step-by-Step Tutorial
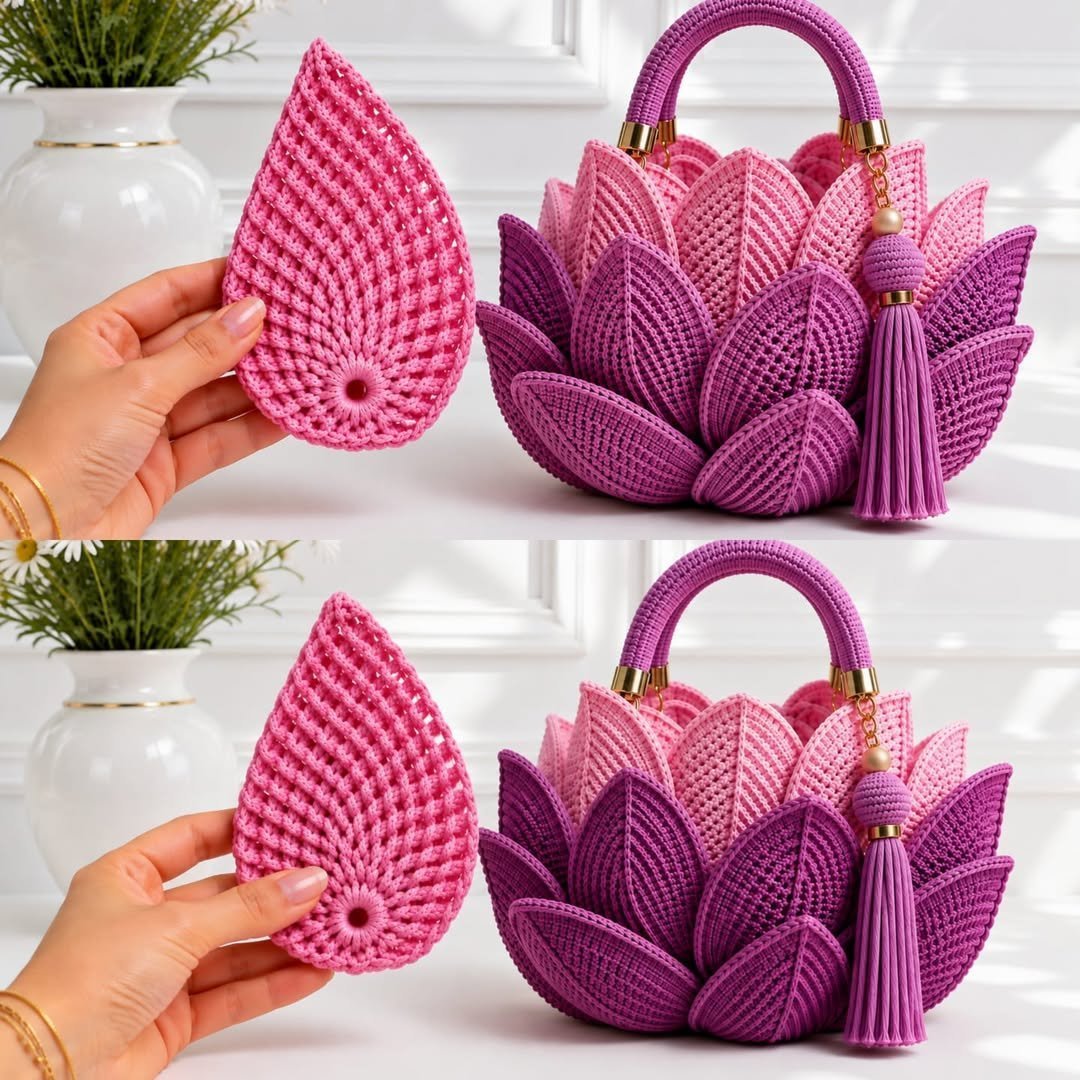
If you’re ready to create a stunning accessory that combines artistic flair with practical functionality, you’re in the right place! In this tutorial, I will guide you through the process of crocheting a Lotus Flower & Leaf Bag. This beautiful handmade bag showcases intricate floral motifs that can elevate any outfit and promises to be a delightful project for both beginners and seasoned crocheters. By the end of this tutorial, you’ll have a detailed understanding of the techniques, materials, and assembly required to make your very own bag.
Project Plan
The Lotus Flower & Leaf Bag consists of several key components:
- Base of the Bag: This provides the structure for your bag.
- Decorative Motifs: These include flowers and leaves, which create the centerpiece design.
- Assembly: Attaching the motifs to the bag body.
- Edging: Adding a decorative border to finish the top of the bag.
- Finishing Touches: Weaving in ends and possibly adding a fabric lining for durability.
You will crochet all the necessary pieces before assembling them into the completed bag. The addition of materials like fabric for lining or hardware for handles can enhance the functionality of your bag, though they are optional.
Materials and Tool Selection
Verified Materials:
- Yarn: Use medium-weight cotton yarn for durability, washability, and shape retention.
- Crochet Hook: A size G (4.0 mm) hook is typically a good fit; however, refer to your yarn label for specific recommendations.
- Tapestry Needle: Essential for weaving in ends and attaching motifs.
- Stitch Markers: Useful for tracking rounds during the base construction.
- Optional Lining: Adding a fabric lining helps keep your bag structured and provides a nice contrast to the yarn’s texture.
Suggested Choices:
- Alternative Yarn: Consider using acrylic yarn for a softer feel, though this may change the overall drape and sturdiness of the bag.
- Metallic Threads: Incorporating metallic threads can add shimmer to your flowers, but this is not a necessity.
Effect of Materials:
Choosing the right yarn fiber and thickness affects the overall structure and wearability of your bag. Cotton yarn typically yields a sturdier finished item compared to acrylic. Always make a gauge swatch to ensure your crochet density matches your desired measurements.
Terminology and Techniques
Familiarize yourself with the following US crochet terminology and techniques used throughout this tutorial:
- Chain (ch): A foundational stitch.
- Single Crochet (sc): A basic stitch that creates a compact texture.
- Double Crochet (dc): A taller stitch that creates a more open fabric.
Key Techniques Used:
- Chain: Begin all projects with a chain. For your base, you’ll create a chain of a specified length.
- Working in Rounds: This allows for seamless construction of the bag body. Each round is joined with a slip stitch into the first stitch.
- Joining Motifs: Use a tapestry needle or crochet method for firmly attaching your flowers and leaves.
- Weaving in Ends: This final touch secures any loose ends for a polished finish.
Measurements and Preparation
Before starting your project, check your gauge:
Gauge Swatch: Create a swatch using your chosen yarn and hook size. For instance, crochet a square measuring 4” x 4”. After washing or blocking your swatch, measure it again to see if it matches your desired gauge (stitch count per inch). Aim for consistent tension to ensure uniform size.
Detailed Working Method
Stage 1: Create the Base
-
Foundation Chain: Start by chaining 30 stitches (adjust based on your gauge).
-
Join to Form a Circle: Slip stitch into the first chain to create a loop, being careful not to twist.
-
Round 1: Chain 1 (does not count as a stitch), then work 30 single crochets into the circle. Slip stitch to the first single crochet to close the round.
-
Round 2: Chain 1, then single crochet into the same stitch. Work 2 single crochets in the next stitch. Repeat this pattern until you complete the round (60 single crochets total).
Checkpoint: You should have a round base measuring approximately 6” in diameter. Adjust your tension accordingly if it is too large or small.
Error Correction: If your base has gaps or irregularities, focus on maintaining even tension and a consistent stitch size.
Stage 2: Create Decorative Motifs
Lotus Flower:
-
Round 1: Start with a magic ring or chain 4 and join. Work 12 double crochets into the ring.
-
Round 2: Work 2 double crochets in the first stitch, followed by 1 double crochet in the next stitch. Repeat this sequence until you have 18 double crochets total.
-
Round 3: To create petals, work 5 double crochets in the next stitch, skip 2 stitches, and slip stitch into the next. Repeat this pattern until you have all petals needed (typically 6).
Checkpoint: Each flower should measure approximately 4” wide with distinct petal shapes.
Common Challenge: Ensure uniform size in each petal. If they’re inconsistent, revisit your tension during double crochet stitches.
Leaf Motif (simplified version):
-
Round 1: Chain 8, then turn.
-
Row 1: In the second chain from the hook, single crochet 6 stitches, then in the last stitch, work 3 double crochets.
-
Row 2: Working back down, single crochet in each of the next 6 stitches.
Checkpoint: Adjust leaf sizes to complement your flowers as needed.
Stage 3: Assembly
-
Positioning Motifs: Arrange your flowers and leaves around the base of the bag.
-
Attachment: Using the tapestry needle, sew each flower securely to ensure they lie flat without pulling on the bag body. Adjust the tension for a neat finish.
Tip: Visualize your final placement before securing the motifs.
Stage 4: Edging
-
Finishing Edge: For a decorative touch, single crochet around the top edge of the bag.
-
Scalloped Edge: For a scalloped look: work (single crochet in the stitch, skip 1 stitch, work 5 double crochets in the same stitch, skip 1 stitch) around the entire top of the bag until you reach your starting point.
Checkpoint: You should have a clean, finished edge that complements the floral motifs.
Stage 5: Finishing Touches
- Weaving in Ends: Using your tapestry needle, weave in any loose ends securely.
- Adding Lining (optional): Cut fabric slightly smaller than your bag, then stitch it in place, ensuring it aligns well with the top.
Troubleshooting
| Symptom | Likely Cause | Practical Correction |
|——————————-|—————————————–|————————————-|
| Uneven base | Inconsistent tension | Maintain even tension while crocheting |
| Motifs not attaching flat | Excess yarn on stitches | Reduce the amount used in attachments |
| Bag not holding shape | Incorrect yarn choice | Ensure cotton yarn or suitable alternative is used |
| Sagging appearance | Lack of stabilizing lining | Reinforce with fabric lining |
Variations, Care, and FAQ
Variations
- Experiment with colors and textures for seasonal looks.
- Change the size by altering the foundation chain and rounds of the base.
- Swap crochet straps for leather or fabric handles to change the look and feel.
Care
- Cleaning: Hand wash in cold water with gentle detergent, avoiding wringing.
- Drying: Lay flat to dry, keeping out of direct sunlight to prevent fading.
Frequently Asked Questions
-
How long will it take to make?
The time varies; expect anywhere from a few hours to a couple of days, depending on your speed. -
Can I use different yarn types?
Yes, but this may alter the overall structure of the bag. -
What if I struggle with flowers?
Many resources are available online for learning flower motifs. -
How can I ensure that my bag is strong enough?
Use medium-weight yarn and consider lining to strengthen critical areas.
Completion Checklist
- [ ] Base completed and checked for size.
- [ ] Decorative motifs created and securely attached.
- [ ] Edging applied neatly.
- [ ] All ends woven in and finishing completed.
- [ ] Lining added if desired.
You now have everything you need to create your very own Lotus Flower & Leaf Bag! Happy crocheting!