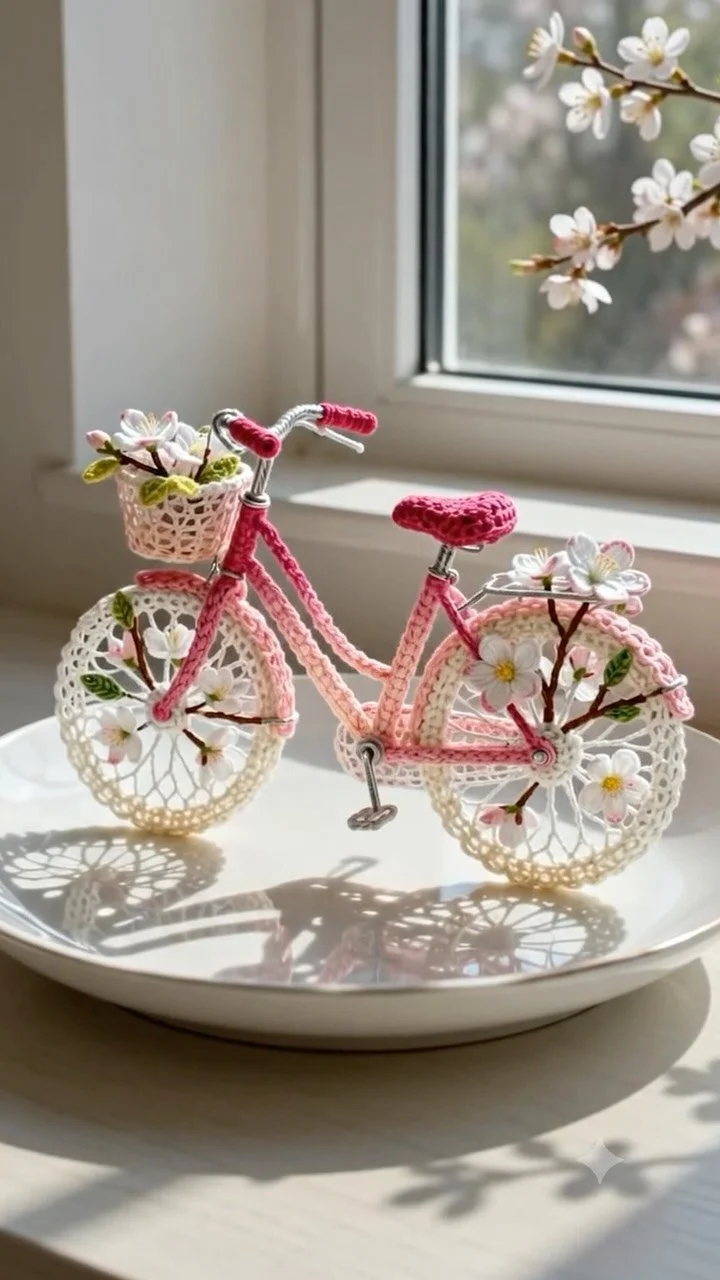
Crochet Cherry Blossom Bike: a delicate tiny masterpiece
Pedaling into Spring with a Delicate Crochet Cherry Blossom Bike 🌸🚲
In this tutorial, you’ll learn how to create a charming crochet cherry blossom bike, perfect for welcoming the spring season! This project will guide you through various crochet techniques, material selection, and assembly processes to bring this tiny masterpiece to life. We’ll cover everything from the foundational components to troubleshooting common issues along the way. Let’s get started!
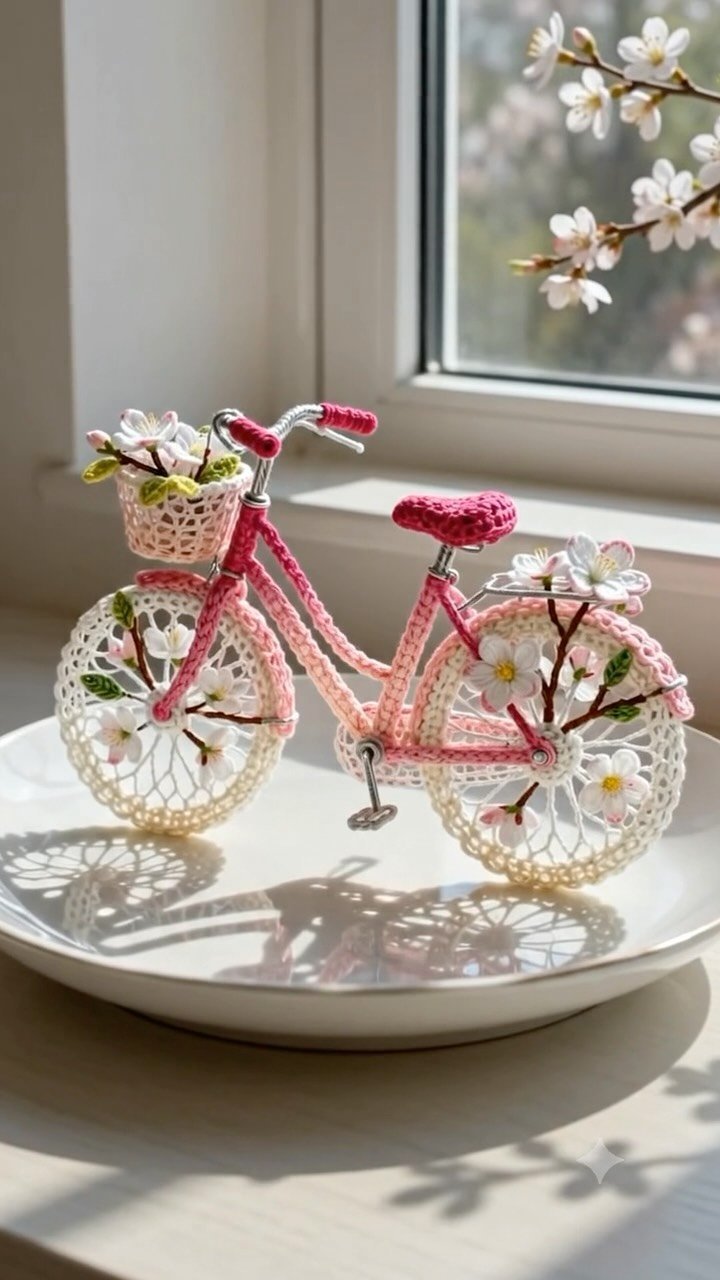
Project Plan
This crochet cherry blossom bike consists of several components:
- Bicycle Frame: The simple base structure of your bike.
- Wheels: Two functional wheels that support the bike’s body.
- Handlebars: Decorative additions to complete the bike’s look.
- Cherry Blossoms: Handcrafted flowers that add charm and celebration of spring.
- Assembly: Bringing all components together into a cohesive piece.
The assembly order is as follows:
- Create the bicycle frame.
- Construct the wheels.
- Crochet the handlebars.
- Form the cherry blossoms.
- Assemble all components together.
Materials and Tool Selection
Materials Needed:
- Yarn: Lightweight yarn in pastel colors for the bike frame and blossoms.
- Suggested Yarn: Cotton or Acrylic blends are ideal, providing both elasticity and structure.
- Crochet Hook: Size G (4.0 mm) is recommended.
- Scissors: For cutting the yarn.
- Tapestry Needle: For weaving in ends.
Choosing the right yarn is crucial, as the fiber and thickness affect the drape and structure of your bike. For best results, test a small swatch before starting the project to evaluate your yarn’s behavior and adjust the hook size if necessary.
Prepare a Yarn Sample:
- Chain 10 stitches.
- Single crochet (sc) back for 10 rows.
- Measure: The swatch should measure approximately 2” x 2”. Adjust your hook size if you do not achieve this gauge.
Terminology and Techniques
Familiarize yourself with the following crochet abbreviations:
- ch: Chain
- sc: Single Crochet
- sl st: Slip Stitch
- dc: Double Crochet
- st(s): Stitch(es)
Basic Techniques
Single Crochet (sc)
- Insert the hook into the stitch.
- Yarn over (YO) and pull up a loop (2 loops on the hook).
- Yarn over again and pull through both loops (1 loop remains on the hook).
- This stitch creates a tight, compact structure.
Slip Stitch (sl st)
- Insert hook into the stitch.
- Yarn over and pull through the stitch and the loop on the hook.
Measurements and Preparation
To ensure your crochet cherry blossom bike maintains its intended shape, precise measurements are essential:
- Frame Dimensions: Aim for about 5 inches in length.
- Wheel Diameter: Each wheel should be approximately 1.5 inches.
Using a gauge swatch is vital for determining your project’s success. After creating a gauge swatch, adjust the size of each component if necessary based on your swatch results.
Detailed Working Method
Stage 1: Create the Bicycle Frame
- Chain 20.
- Row 1: Sc in the second chain from the hook and in each chain across (19 sc).
- Rows 2-6: Ch 1, turn; repeat sc across (total of 19 sc).
- Shape the Frame: Fold the crocheted rectangle into a U-shape.
- Sl st across the end to secure.
Checkpoint: The frame should resemble a U-shape, measuring about 5 inches in length.
Stage 2: Crochet the Wheels
- Magic Ring: Create a magic ring and secure it.
- Round 1: Work 8 sc into the magic ring.
- Round 2: 2 sc in each st around (16 st).
- Round 3: (1 sc in next st, 2 sc in next st) repeat around (24 st).
- Continue building until your wheel measures approximately 1.5 inches. Fasten off.
Common error: If your wheel size is too small, consider adding extra rounds or adjusting your tension.
Stage 3: Crocheting the Handlebars
- Chain 5 and sl st to form a loop.
- Round 1: Sc into the loop 10 times (10 sc).
- Round 2: 2 sc in each st around (20 sc).
- Shape into your desired style and secure.
Checkpoint: The handlebars should form a small cylindrical shape.
Stage 4: Form the Cherry Blossoms
- Chain 4 and join to form a loop.
- Round 1: Sc into the loop 6 times.
- Round 2: 2 dc in each st (12 st).
- Create flower petals by working sc, dc, and sl st to shape the flower.
Visual Checkpoint: Each blossom should have a rounded petal appearance.
Stage 5: Final Assembly
- Position Wheels: Sew wheels onto the frame, ensuring they are aligned.
- Attach Handlebars: Secure handlebars at the front of the bike.
- Adorn with Blossoms: Sew cherry blossoms onto the frame and handlebars to complete your design.
Final Check: Confirm that all components are securely attached and aligned.
Assembly and Finishing
Use a tapestry needle to attach each component:
- Ensure that the structure is stable and that no parts flop around.
- Weave in all loose ends to ensure a clean finish.
Troubleshooting
| Symptom | Likely Cause | Practical Correction |
|—————————|—————————|————————————|
| Frame collapses | Too few stitches | Add more support stitches. |
| Wheels do not spin | Incorrect tightness | Loosen stitching slightly. |
| Blossoms droop | Too heavy on yarn | Reduce the number of leaves. |
| Uneven frame | Gauge mismatch | Check your stitch count and adjust.|
Variations, Care, and FAQ
Variations:
- Change the color of the bike frame for a different aesthetic.
- Add small accessories like a basket or bird for additional charm.
Care:
- Hand wash your completed project in cold water and lay flat to dry.
Frequently Asked Questions
What yarn weight should I use?
- A light worsted (4) weight yarn works best for this project.
Can I use a different hook size?
- Yes, but make sure to test your gauge first.
How can I reinforce the bike’s structure?
- Consider using a wire frame or pipe cleaner for additional support.
Can I personalize this project?
- Absolutely! You can add initials or custom embellishments to make it unique.
Completion Checklist
- All components are crocheted accurately.
- Parts are assembled securely.
- Ends are woven in neatly.
- Cherry blossoms are adorning the frame for that perfect spring effect!
Now you’re ready to pedal into spring with your beautiful crochet cherry blossom bike! Enjoy this delightful crafting experience and happy crocheting!