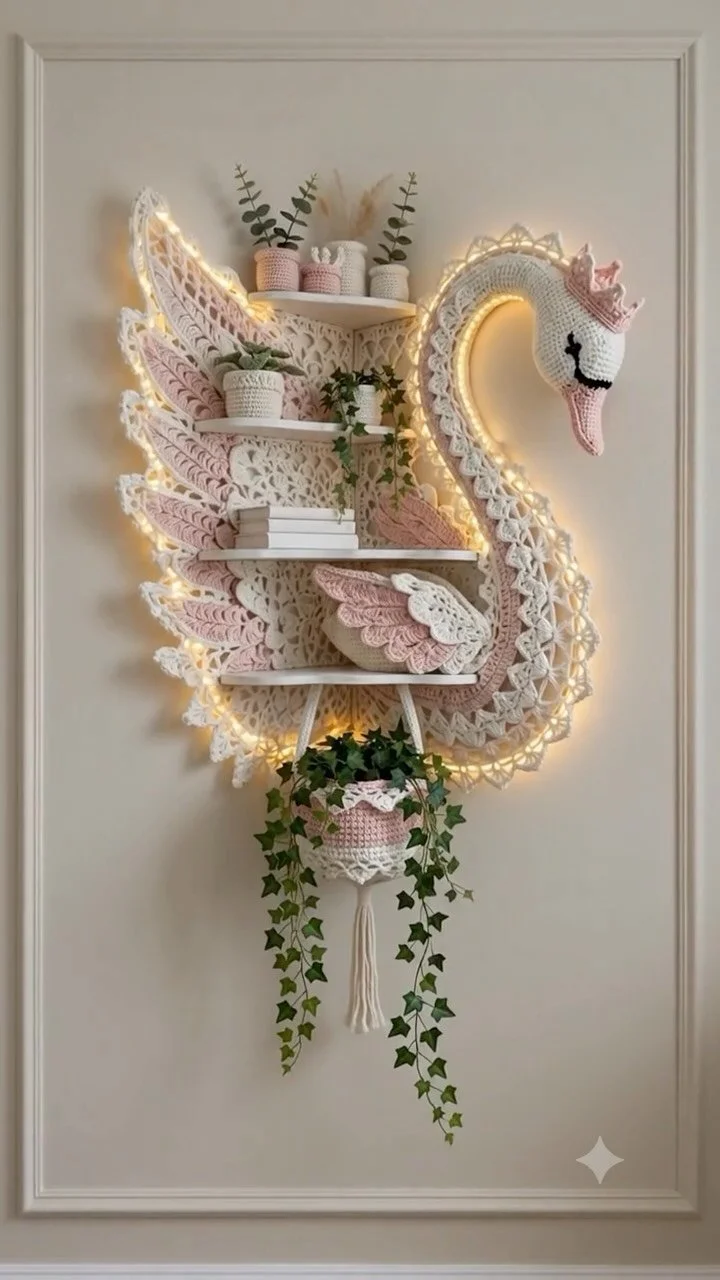
Crochet Swan Shelf with Delicate Wings for Cozy Wall Decor
Crochet Swan Shelf: Cozy Wall Decor with Delicate Wings
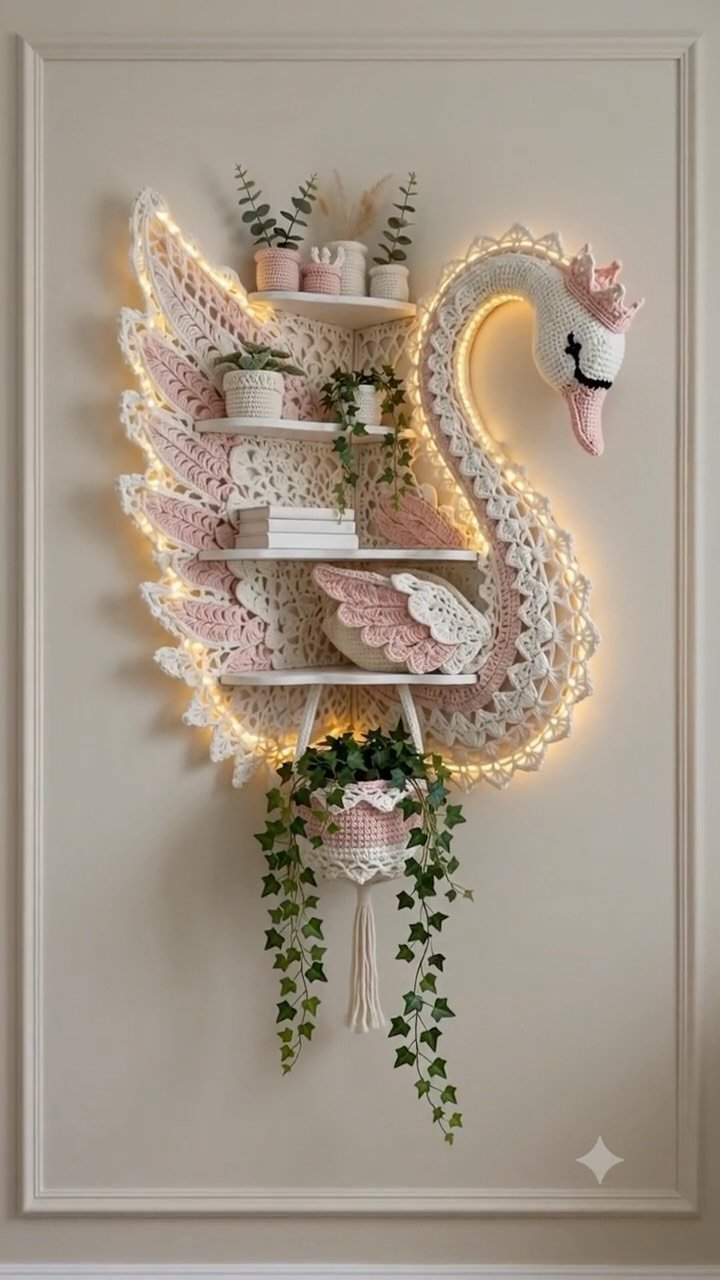
Creating a crochet swan shelf is a fun and engaging way to combine practicality with artistic flair. In this tutorial, you will learn to craft a charming swan with graceful wings, soft pink accents, and whimsical fairy lights. This project is great for enhancing your crochet skills as you work through various techniques, resulting in a lovely piece to decorate your wall.
Project Plan
This project involves multiple components:
- Swan Body: The main structure that serves as the shelf.
- Wings: Two delicate wings that will adorn either side of the swan.
- Decorative Details: Soft pink elements that will be incorporated into the body and wings.
- Lighting Integration: The addition of fairy lights to create a magical ambiance.
The construction process will start with making the swan’s body, followed by the wings, and finishing with the decorative details and the lighting.
Materials and Tool Selection
To create your crochet swan shelf, gather the following materials:
-
Yarn:
- White yarn for the swan’s body (approximately 200 yards).
- Soft pink yarn for accents (approximately 50 yards).
- Optionally, you may also use lightweight sparkle yarn for decorative elements.
-
Crochet Hook: Use a size H/8 (5 mm) hook, or adjust based on your personal tension preferences.
-
Scissors: Essential for cutting the yarn.
-
Tapestry Needle: Needed for weaving in ends and sewing pieces together.
-
Wire Frame (Optional): This will provide added structure to the swan’s body.
-
Fairy Lights: Battery-operated lights that can be safely hidden within the swan’s structure.
Selecting the right yarn fiber is crucial as it impacts both the strength and aesthetic of your project. Cotton and wool blends provide durability, while acrylic yarn allows for a broader color palette. It’s advisable to create a gauge swatch to ensure your stitches meet the desired size and tension.
Sample Gauge
For a 4-inch square, aim for approximately:
- 12 stitches
- 14 rows in single crochet.
Terminology and Techniques
Before we start, familiarize yourself with the following US crochet terms:
- ch: chain
- sc: single crochet
- sl st: slip stitch
- dc: double crochet
- st: stitch
Basic Stitch Instructions
Here are the basic stitch instructions necessary for this project:
Single Crochet (sc)
- Insert the hook into the stitch.
- Yarn over and pull through (you should have 2 loops on the hook).
- Yarn over again and pull through both loops (1 stitch completed).
Double Crochet (dc)
- Yarn over, insert the hook into the stitch.
- Yarn over and pull through (you should have 3 loops on the hook).
- Yarn over and pull through the first two loops (2 loops remain).
- Yarn over again and pull through the last 2 loops (1 stitch completed).
Slip Stitch (sl st)
- Insert the hook into the stitch.
- Yarn over and pull through both the stitch and the loop on the hook (1 stitch completed).
Measurements and Preparation
For this project, it’s essential to measure accurately. You’ll need to ensure the following dimensions for the swan:
- Height: Approximately 12 inches for the body.
- Wingspan: About 10 inches across the wings.
Start by creating a gauge swatch, as highlighted earlier, to test your yarn and hook choices. After washing, you may want to block your swatch to ensure even stitches and appropriate tension.
Detailed Working Method
1. Create the Swan Body
Start by creating the foundation chain for the swan’s body:
Instructions:
- Foundation: Chain 48 and join to form a ring.
- Round 1: Ch 1, sc in each chain around (total: 48 sc). Join with a sl st.
- Round 2-8: Continue working in sc, increasing to reach 60 stitches by the end of Round 8.
Stopping Condition: By the end of Round 8, you should have a rounded balloon shape measuring around 6 inches in height.
2. Wings
Now, you’ll create the wings to give the swan its delicate appearance.
Instructions for Each Wing:
- Foundation: Chain 21.
- Row 1: Dc in the 4th ch from hook and in each ch across (total: 18 dc).
- Row 2: Ch 3, turn, dc in each st across (total: 18 dc).
- Row 3: Decrease in the middle 6 stitches, leaving 12 dc.
Stopping Condition: Each wing should be approximately 8 inches wide and have a graceful curve.
3. Pink Accents
To add charm to your swan, create some small pink flowers or embellishments:
Instructions for a Simple Flower:
- Foundation: Chain 5 and join to form a ring.
- Round 1: Work 10 sc into the ring. Join with a sl st.
- Round 2: Ch 3, then dc in each st around to form petals.
Stopping Condition: The completed flower should measure about 2 inches in diameter.
4. Light Integration
To incorporate fairy lights into the swan:
- Choose Location: Decide where within the swan’s body you want to insert the lights.
- Create an Opening: Use your scissors to carefully create a small opening for the lights.
Common Error: Ensure the opening isn’t too large, allowing the lights to remain concealed.
Assembly and Finishing
For the final assembly of your crochet swan shelf, follow these steps:
- Join the Wings: Position the wings about halfway up the swan’s body. Secure them using a tapestry needle and yarn, ensuring a tight attachment.
- Attach Pink Accents and Flowers: Position them where they complement the swan’s design, and sew them in place.
- Insert Lights: Once the lights are positioned, carefully insert them through the prepared opening and check for functionality.
Checking Alignment: Make sure the wings mirror each other and that the shelf is balanced.
Troubleshooting
| Symptom | Likely Cause | Practical Correction |
|—————————|——————————-|———————————–|
| Body shape is uneven | Incorrect stitch tension | Adjust your crochet style; rework as necessary. |
| Wings won’t stay attached | Too few stitches | Use more stitches or stronger yarn for a secure hold. |
| Lights dim or don’t work | Battery issue or wrong placement | Check batteries and realign lights for proper function. |
Variations, Care, and FAQ
- Variations: Consider adding more colors or experimenting with the swan’s pose.
- Care: Hand wash gently and air dry to maintain the shape of your creation.
Frequently Asked Questions
-
Can I use a thicker yarn?
Yes, but you may need to adjust your hook size and stitch count accordingly. -
How can I ensure a clean finish?
Be sure to weave in all ends securely and block your pieces for an even shape. -
How do I make the shelf sturdy?
Consider including a light wire frame within the body for hanging heavier items. -
Can I personalize my swan?
Absolutely! Feel free to explore different yarns and accessories to make it uniquely yours.
Completion Checklist
- [ ] Created swan body and ensured proper shape.
- [ ] Made wings and attached securely.
- [ ] Added decorative elements.
- [ ] Integrated fairy lights properly.
With a touch of creativity and enjoyment in the process, your crochet swan shelf will add charm to any room. Happy crocheting, and don’t forget to share your beautiful creation!