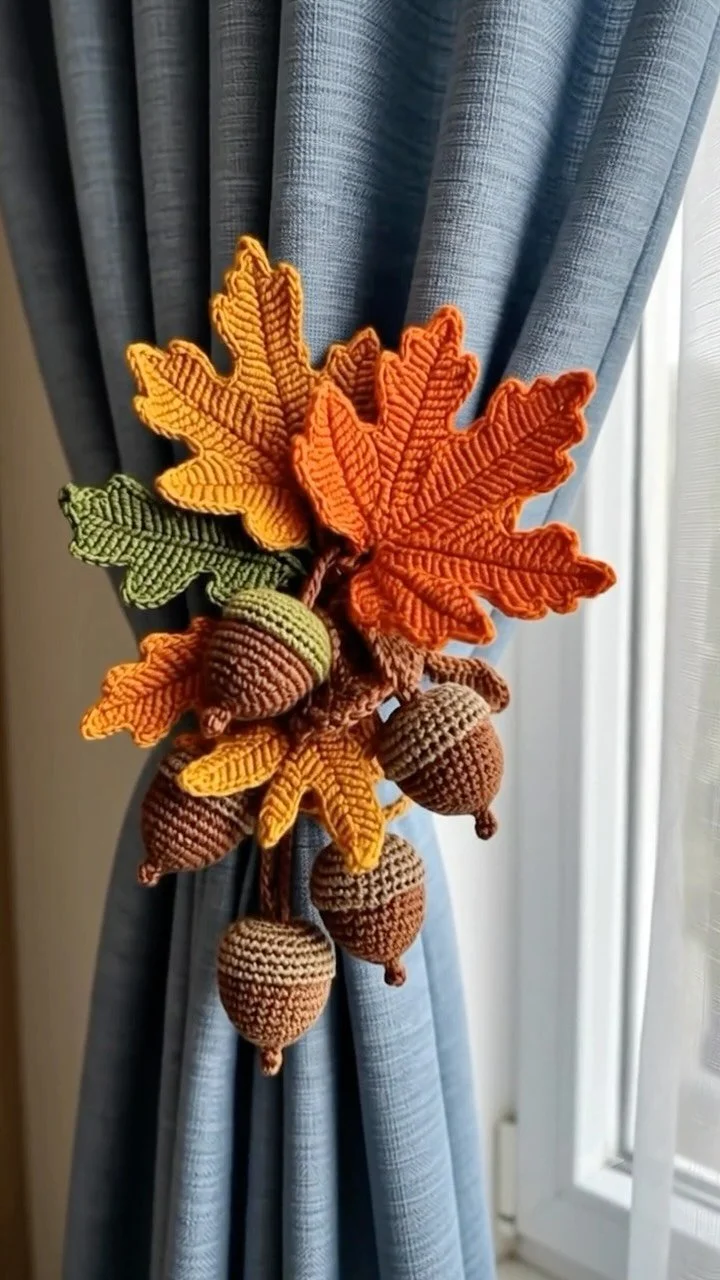
Crochet Handmade Maple Leaves and Acorns for Autumn Decor
Crochet Autumn Decor: Handmade Maple Leaves and Acorns
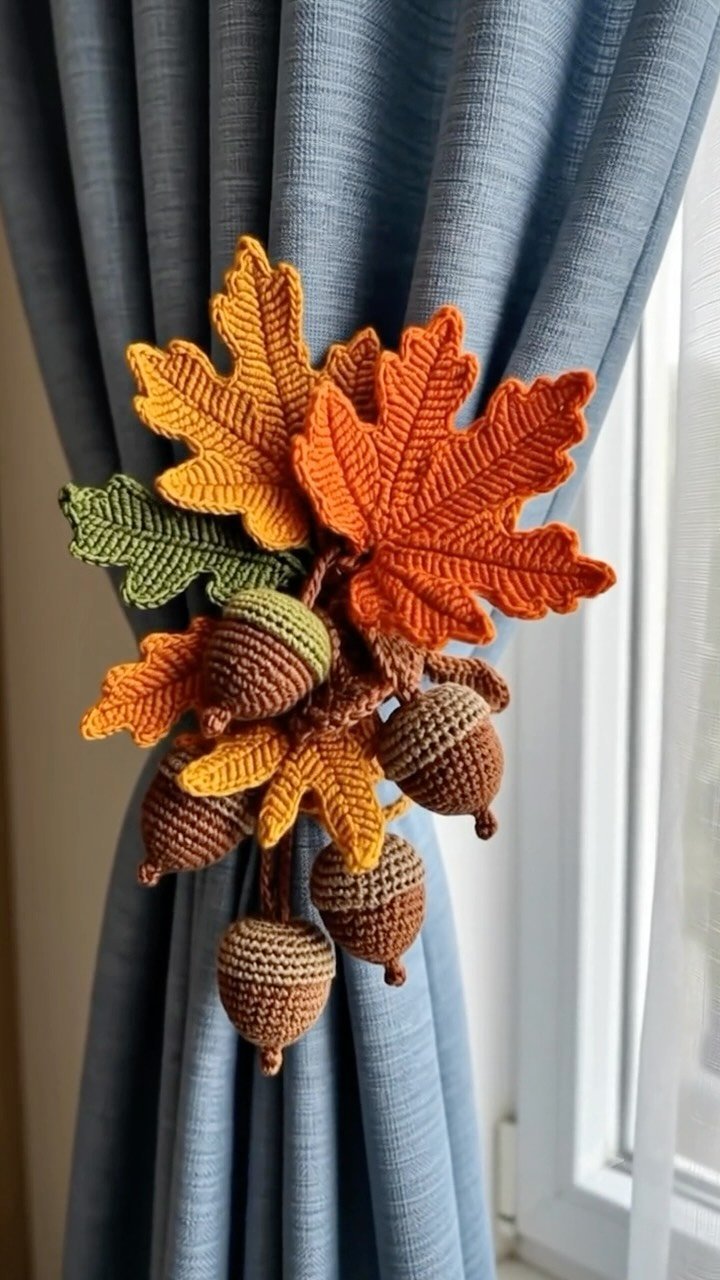
Bring the cozy warmth of autumn right into your home with our crochet autumn decor project! In this tutorial, you’ll learn how to create charming handmade maple leaves and acorns, perfect for decorative curtain tiebacks or thoughtful gifts for fellow crochet lovers. This guide covers everything you need—project plan, materials, techniques, and assembly instructions. Let’s get started!
Project Plan
This project involves creating two main components: crochet maple leaves and acorns. The completed pieces will serve as decorative tiebacks for your curtains. Here’s the assembly order we’ll follow:
- Maple Leaves: Crochet the leaves first, creating multiple pieces to achieve a lush, layered look.
- Acorns: Next, crochet the acorns in quantities that complement your leaves.
- Assembly: Finally, arrange the leaves and acorns into a cohesive tieback design, securing them so they are aligned and visually pleasing.
Materials and Tool Selection
Required Materials:
-
Yarn:
- Worsted weight yarn in autumn colors (red, orange, yellow for leaves; brown for acorns).
- Select a warm and durable yarn to ensure a cozy feel.
-
Crochet Hook:
- Suggested sizes: H (5.0 mm) or I (5.5 mm). Choose a hook size that suits your yarn to achieve neat stitches.
-
Tapestry Needle:
- For weaving in ends and sewing components together.
-
Embroidery Floss or Detailing Yarn (optional):
- Use for adding details to your leaves and acorns.
-
Stitch Markers:
- Helpful for marking rounds and important stitch counts.
Yarn and Hook Selection
The type and thickness of the yarn you choose will influence the drape, warmth, and overall appearance of your finished items. Worsted weight yarn provides a solid and cozy look, ideal for this project. Before starting, create a swatch with your chosen yarn and hook to ensure you achieve a fabric that holds its shape without being too rigid.
Making a Sample
To better understand your gauge, crochet a 4”x4” square using your selected yarn and hook. Count the number of stitches that fit within that square horizontally and vertically. Aim for approximately 16 stitches and 20 rows for the worsted weight yarn. Adjust your hook or yarn as needed based on your swatch results.
Terminology and Techniques
Familiarize yourself with the following terms and techniques to complete this project:
- Chain (ch): Creates the base of your work by chaining the desired number of stitches.
- Single Crochet (sc): Insert your hook into a stitch, yarn over, pull up a loop, yarn over again, and pull through both loops.
- Double Crochet (dc): Yarn over, insert hook, yarn over again, pull up a loop, yarn over and pull through two loops, yarn over again, and pull through the remaining two loops.
- Slip Stitch (sl st): Insert your hook into the stitch, yarn over, pull up a loop, and pull through the loop on your hook.
Key Stitches to Focus On
- Foundation Chains: Essential for starting both leaves and acorns.
- Working in Rounds: Particularly important for shaping acorns effectively.
- Joining with Slip Stitch: Required for attaching various components.
Detailed Working Method
Stage 1: Crocheting the Maple Leaves
Foundation Chain:
- Ch 17: This sets the width for your leaf.
Row 1 (Right Side):
- Starting in the second chain from the hook, sc across: (16 sc).
- Check: Ensure you have a total of 16 stitches.
Row 2:
- Ch 1, turn, and work a dc in the first sc, followed by (1 dc in the next sc, 2 dc in the following sc) across until the end (total of 20 dc).
- Checkpoint: Count to verify you have 20 double crochets.
Leaf Shaping:
- Continue crocheting in a similar manner, using increases and decreases to shape the leaf until it reaches the desired outline. At its widest point, you should have about 30 stitches wide.
Finishing the Leaf:
- Fasten off and weave in all ends.
- Error Check: Look out for any holes or uneven stitches; if you encounter these, unravel and even them out.
Stage 2: Crocheting the Acorns
Foundation Ring:
- Create a magic ring and ch 1.
Round 1 (Working in Rounds):
- Work 6 sc into the ring, then pull it tight.
- Slip stitch to the first sc to join.
Round 2:
- Ch 1, and increase: (2 sc in each sc around) until you have 12 sc.
- Checkpoint: Confirm you have a total of 12 uniform stitches.
Further Rounds:
- Continue crocheting and increasing for a total of 5 rounds. The acorn should feel plump yet not too loose.
Finishing the Acorn:
- Fasten off, leaving a long tail for sewing, then weave in ends to reinforce the shape.
Stage 3: Assembly
Arranging the Design:
- Lay out your leaves and acorns in your desired pattern. Consider how they will be positioned for the final tieback structure.
Sewing:
- Using a tapestry needle and strong yarn, sew the acorns to the base of the leaves.
- Tip: Ensure each piece is securely fastened to avoid twisting.
Testing Stability:
- Hold the tieback up to check for balance in design and stability.
Troubleshooting
| Symptom | Likely Cause | Practical Correction |
|——————–|—————————————|——————————————-|
| Leaf is uneven | Incorrect stitch count during shaping | Carefully unravel and adjust rows |
| Acorn feels floppy | Too few rounds completed | Continue working in rounds until firm |
| Tieback sags out | Too heavy material or too few pieces | Balance out your design; add more pieces |
Variations, Care, and FAQ
Variations:
- Experiment with different colors or yarn types (like cotton) to achieve diverse aesthetics.
Care:
- Hand wash your completed pieces with mild soap and lay flat to dry, avoiding wringing out the yarn.
Frequently Asked Questions:
-
What if I don’t want to make a curtain tieback?
These leaves and acorns can also serve as table decorations, wall hangings, or even brooches! -
Can I use different types of yarn?
Absolutely! Just keep in mind that variations in yarn thickness may alter the overall size of your project. -
How do I store my crochet items?
Store them flat in a cool, dry place to avoid deformation. -
What is the best way to secure my ends?
Weave in ends securely using a tapestry needle, ensuring they blend into the stitches without being visible.
Completion Checklist:
- [ ] Complete all crochet pieces (leaves and acorns).
- [ ] Assemble and secure all components.
- [ ] Ensure weaving in and finishing are complete.
- [ ] Enjoy your cozy autumn decor!
Bring the cozy warmth of autumn into your living space with this delightful crochet project. Happy crocheting!