Crochet Camera Pouch: A Stylish Handmade Camera Case
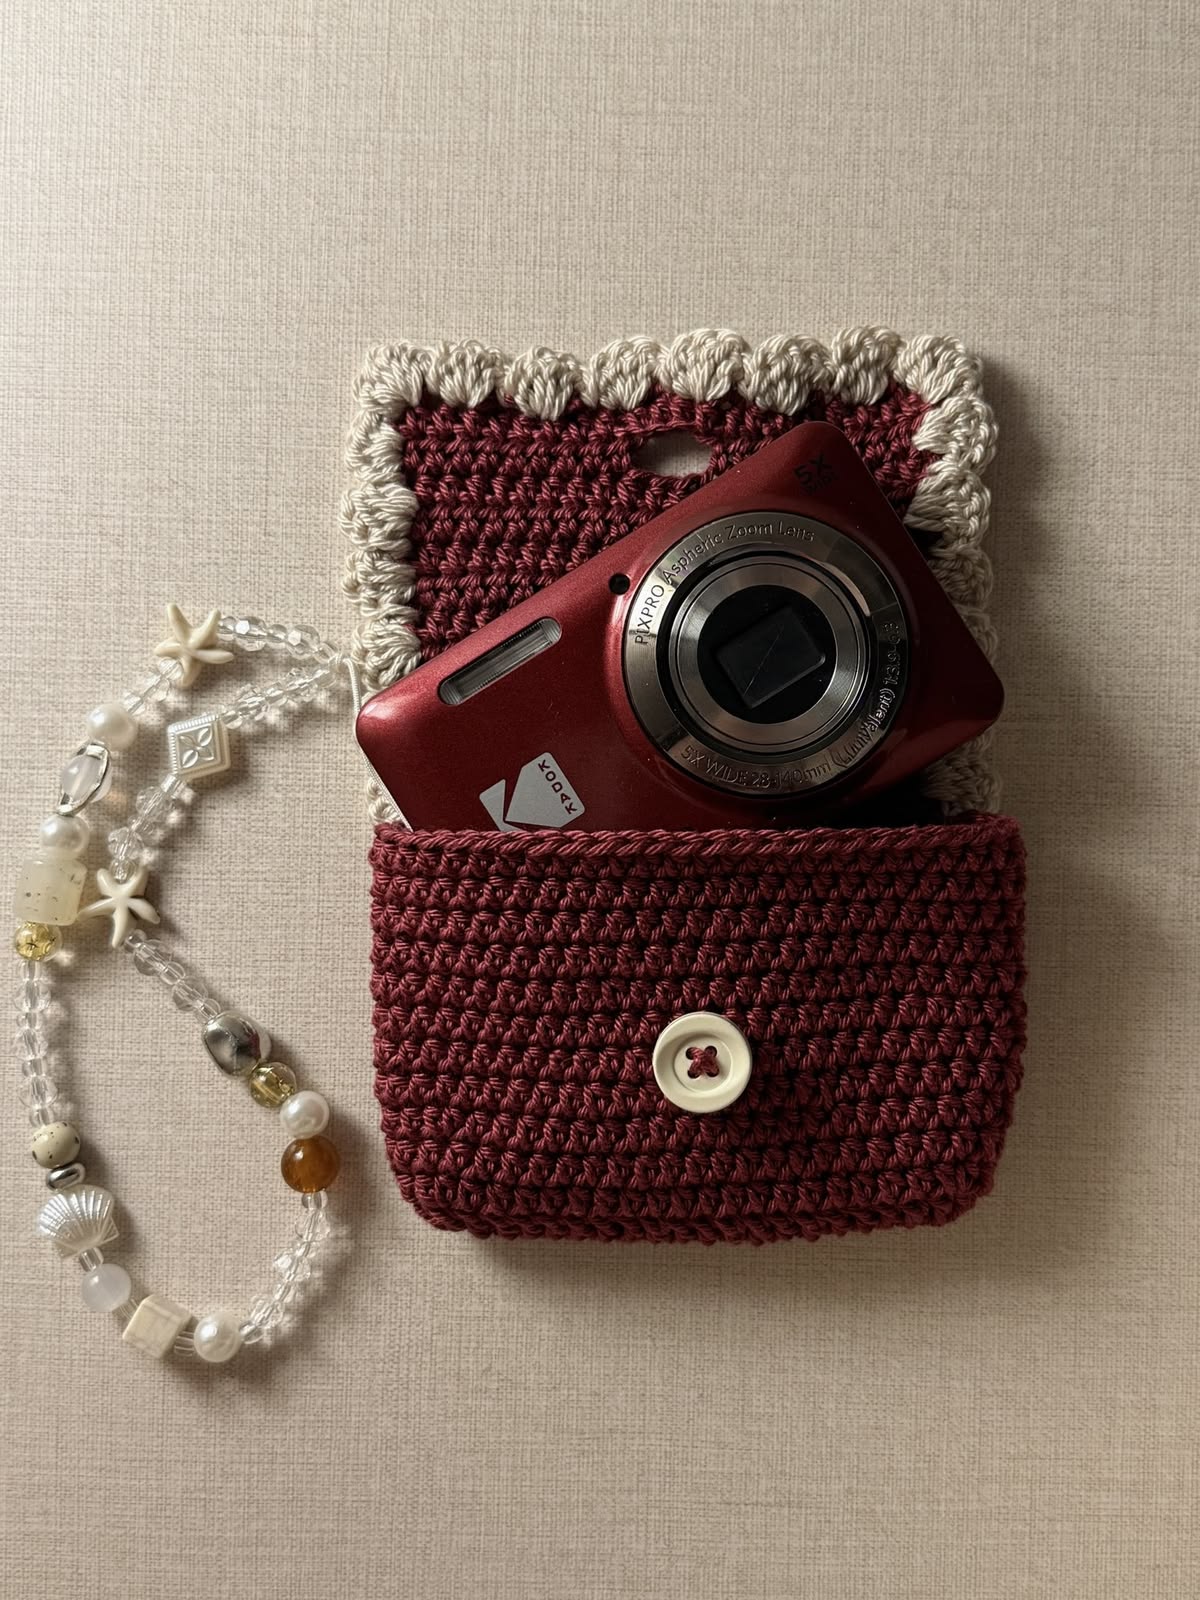
There is something special about making a handmade accessory for something you use and love every day. This crochet camera pouch combines practical storage with a beautiful handmade design, creating a soft protective case that is both useful and personal. With its rich burgundy color, textured crochet fabric, contrasting cream edging, and simple button closure, this project has a charming vintage-inspired appearance while still feeling modern and wearable.
Whether you use a compact digital camera, a small point-and-shoot camera, or simply want a beautiful handmade pouch for another small electronic device, this design offers plenty of inspiration. The basic construction can also be adapted to different dimensions, colors, yarn types, and closure styles.
Why Make a Crochet Camera Pouch?
A camera is a small object, but carrying it without protection can be inconvenient. A handmade crochet pouch gives you a simple way to create an additional layer between the camera and the other objects inside your bag. It also turns an ordinary camera accessory into something that reflects your personal style.
Unlike a generic commercial case, a crochet pouch can be made specifically around the dimensions of your camera. You can choose the yarn, colors, button, flap style, and decorative details yourself. That makes the project especially appealing to crocheters who enjoy practical handmade accessories rather than purely decorative projects.
The design shown here has a particularly attractive combination of colors. The deep burgundy body gives the pouch a rich and elegant appearance, while the cream border creates contrast around the flap. The large button adds a simple finishing detail without overwhelming the crochet texture.
Project Overview
This crochet camera pouch is essentially a small rectangular crochet case with a front pocket-like body, an upper flap, and a button closure. The construction is visually simple, but several small details make the finished project look polished.
- A dense burgundy crochet body
- A practical rectangular shape
- A flap that folds over the camera opening
- A small buttonhole opening
- A contrasting cream decorative border
- A large button closure
- A soft handmade texture
The finished pouch can be adjusted to fit the exact device you want to carry. This is one of the biggest advantages of making a camera pouch yourself: the project does not have to follow a universal commercial size.
Materials You May Need
The exact materials can be changed depending on the size of your camera and the type of fabric you want to create. For a pouch like the one shown in the photographs, a medium-weight yarn and an appropriately sized crochet hook are a practical starting point.
Yarn
A sturdy yarn is generally a good choice for a camera pouch because the finished fabric should have enough structure to hold its shape. Cotton, cotton blends, or other durable yarns can work well depending on the desired feel.
For the pictured design, the main body uses a deep burgundy or wine-colored yarn, while the border uses a soft cream or ivory shade.
Crochet Hook
Choose a hook that works comfortably with your yarn while producing a reasonably firm fabric. For a protective pouch, extremely loose stitches are usually not ideal because they can make the finished fabric too open and flexible.
Your hook size should ultimately be selected according to the yarn and the tension you naturally produce.
Button
A medium or large button can be used as the main closure. The cream button shown in the finished design creates a beautiful contrast against the burgundy fabric.
Yarn Needle
A yarn needle is useful for weaving in loose ends and attaching the button securely.
Scissors
A small sharp pair of scissors is all you need for trimming the yarn after finishing.
Before You Start: Measure Your Camera
This is one of the most important steps when making a camera pouch. Do not choose the dimensions of the crochet piece based only on the appearance of the photograph. Different cameras have very different widths, heights, and depths.
Measure your camera across its:
- Width
- Height
- Depth
Also consider whether you want to carry anything else inside the pouch. For example, you may want a little extra space for a memory card, battery, lens cloth, or small accessory.
A snug pouch can look beautiful, but it should not be so tight that inserting and removing the camera becomes difficult. On the other hand, an excessively loose pouch may not hold the camera securely.
Understanding the Shape
The overall shape of this project is easier to understand when you think of it as three main sections.
- The main body: the deep burgundy section that surrounds and supports the camera.
- The upper flap: the section that folds over the opening.
- The decorative border: the contrasting cream section that frames the upper portion.
The finished design also includes a button closure that keeps the flap in place. This combination gives the pouch a simple structure without requiring a complicated zipper or metal hardware.
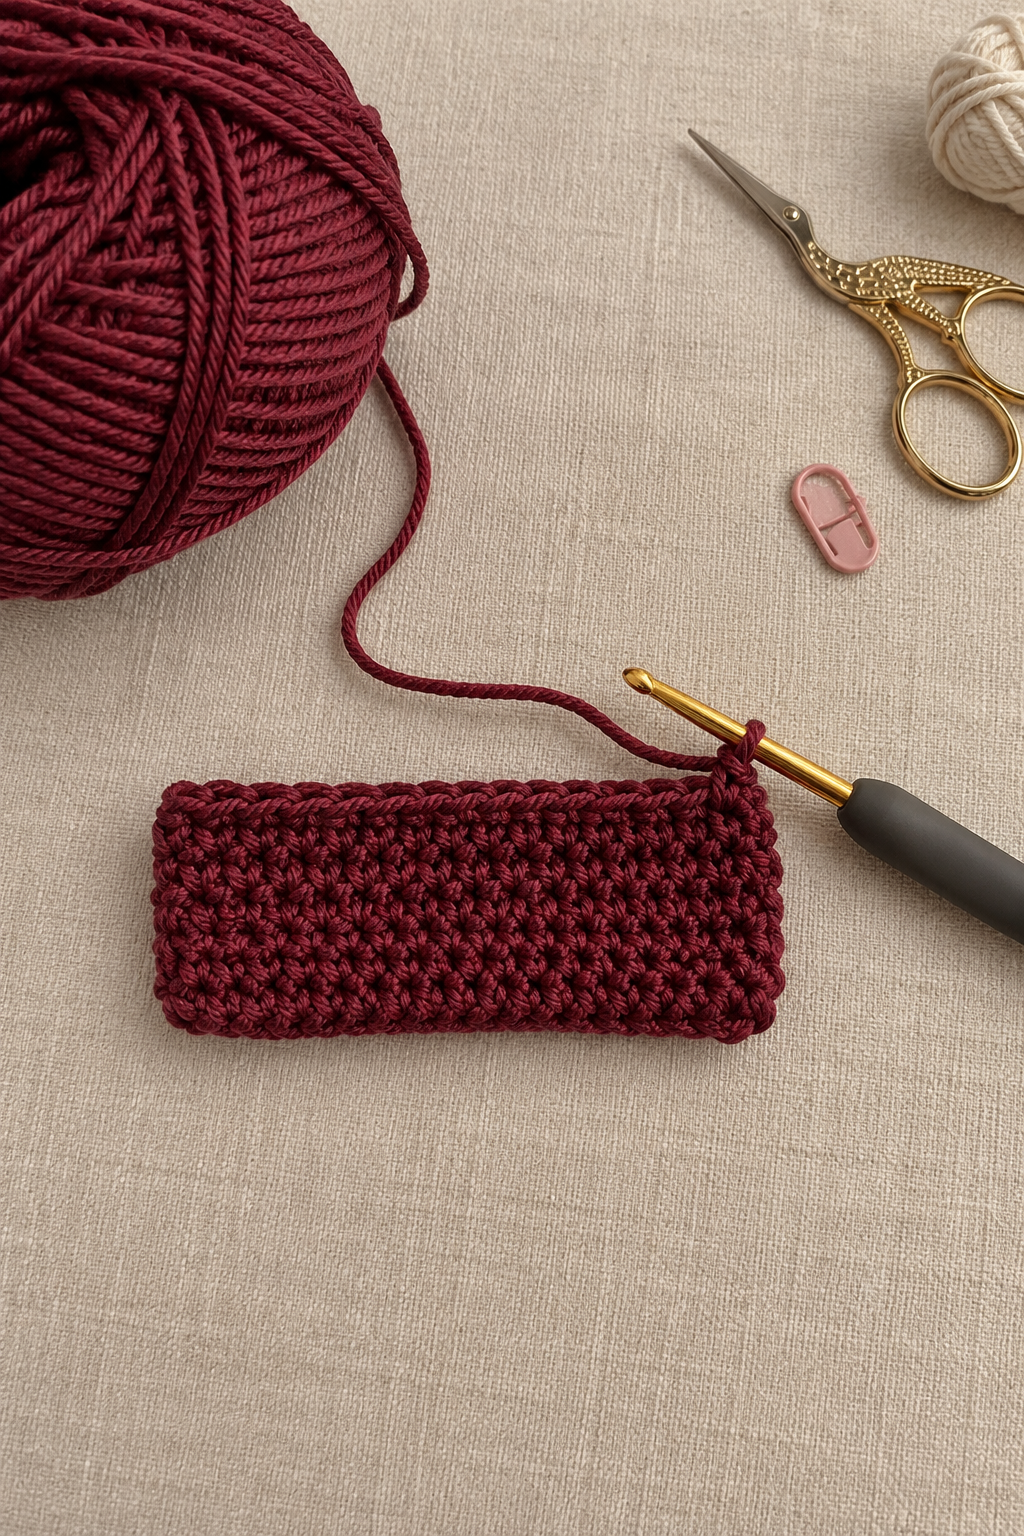
Step 1: Building the Main Crochet Body
The first stage is creating the main burgundy body of the pouch. The goal is to produce a dense rectangular piece that is large enough to accommodate the camera.
The exact number of starting chains and rows will depend on the dimensions of your camera, your yarn weight, your hook, and your individual tension. This is why measuring the camera first is more useful than blindly following a fixed measurement.
As you work, keep the sides as straight and even as possible. A camera pouch benefits from a structured shape, so consistent stitch tension is particularly important.
Keep the Fabric Dense
For a camera case, you generally want a fairly compact crochet fabric. A dense stitch pattern can provide a more substantial feel than a very open lace-like construction.
The textured burgundy fabric shown in the project has a close, even appearance. That texture is part of what makes the finished pouch look substantial rather than flimsy.
Check the Size Frequently
Do not wait until the project is finished to test the size. Place your camera next to the crochet fabric periodically and compare the width and height.
This is especially useful if your tension changes during the project. Even a small difference in tension repeated across many rows can noticeably affect the final dimensions.
Step 2: Creating the Upper Section and Buttonhole
Once the main body reaches the required height, the upper section can be shaped into the flap area. The photographs show a neat horizontal opening near the upper portion of the pouch.
This opening functions as part of the closure system, allowing the button to pass through and keep the pouch closed.
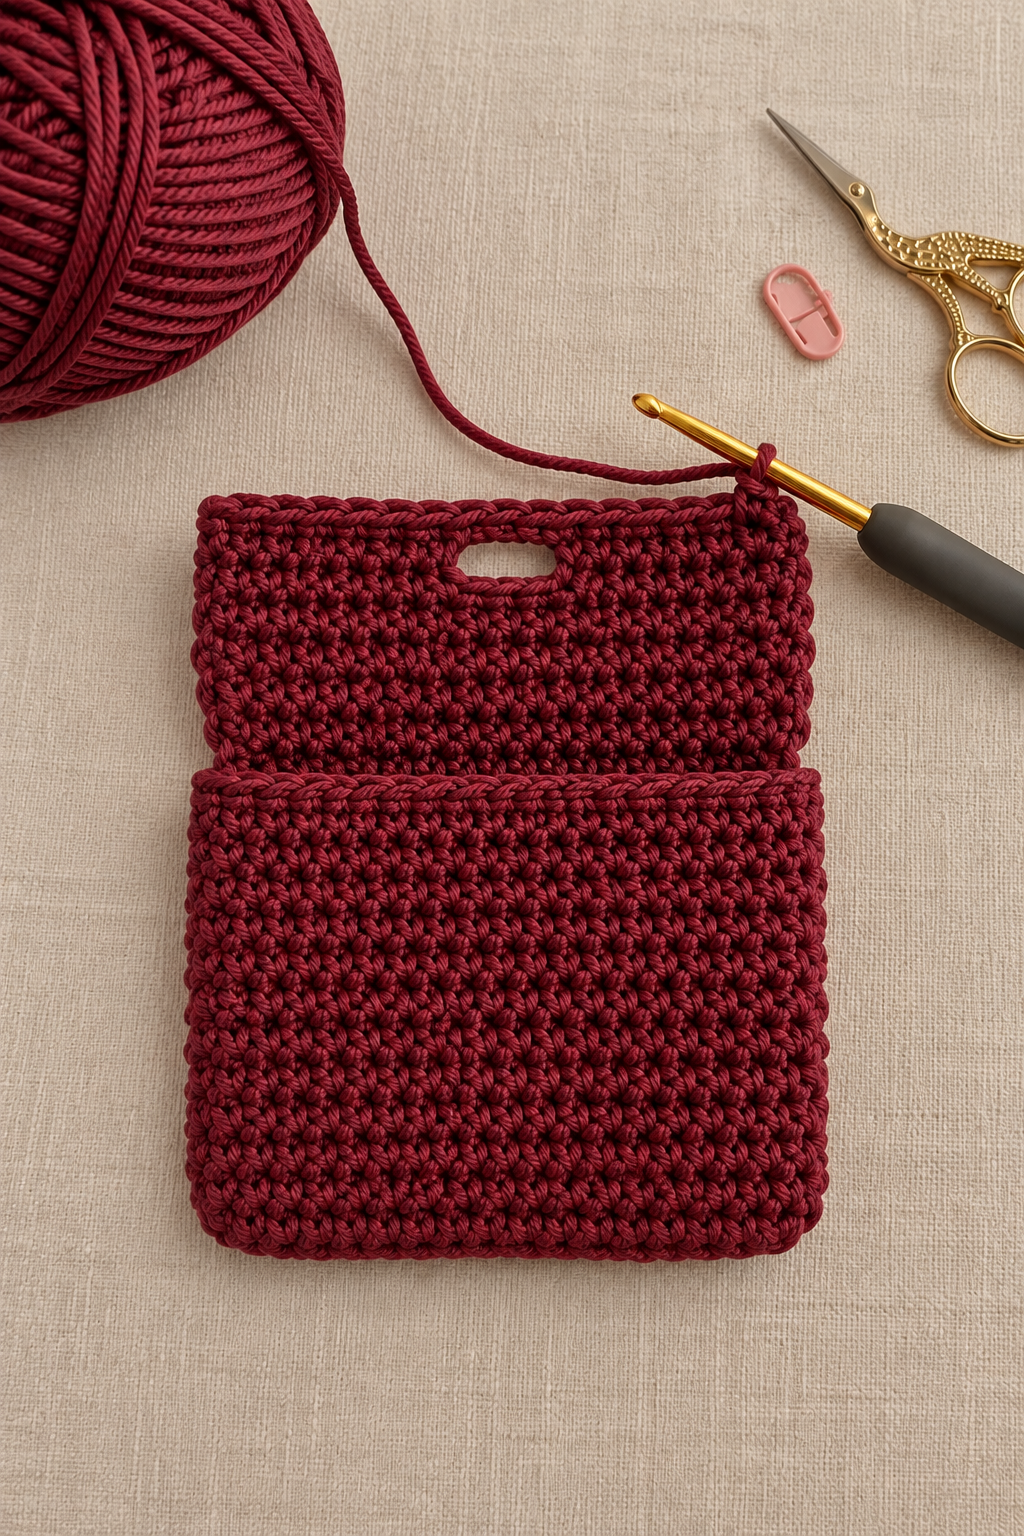
Why the Buttonhole Matters
The buttonhole is a small detail, but it has an important functional role. A well-sized buttonhole keeps the flap secure while still allowing you to open the pouch without pulling excessively on the crochet fabric.
When choosing the button, measure its diameter before finishing the opening. The buttonhole should be large enough for the button to pass through, but not so loose that the flap opens unintentionally.
Step 3: Creating the Decorative Cream Border
One of the most attractive details of this design is the contrasting cream border. Instead of keeping the entire pouch one color, the border frames the flap and creates a soft scalloped appearance.
The contrast between burgundy and cream makes the edge immediately visible. It also gives the project a slightly vintage and romantic character.
The border is made from repeated raised crochet sections that form rounded scallops around the edge. Keeping these sections as even as possible is important for achieving a balanced finish.
Working With a Contrasting Color
When changing from burgundy to cream, make sure your yarn ends are secured neatly. Because the border is highly visible, loose ends or uneven joins can be more noticeable than they would be inside the body of the pouch.
Take your time when working around corners. Corners naturally require more attention because the decorative edge needs to turn without becoming excessively tight or stretched.
Step 4: Finishing the Flap
The flap is the part of the pouch that gives the project its case-like appearance. It folds over the top opening and provides the final layer of protection around the camera.
The flap should be long enough to overlap the front of the pouch comfortably. At the same time, it should not be so long that it becomes difficult to open.
Before attaching the button, fold the flap into its final position and check where the buttonhole meets the front of the pouch. This simple test can prevent the button from being placed too high or too low.
Step 5: Adding the Button
The final functional detail is the button. The large ivory-colored button shown in the project works particularly well because it stands out against the deep burgundy crochet fabric.
You can use a traditional two-hole or four-hole button, depending on your preference. For a handmade camera pouch, choosing a button with an interesting shape or natural finish can make the accessory feel even more unique.
Sew the button firmly to the front of the pouch. Because the button will be repeatedly pulled when opening and closing the case, it should be attached securely rather than with only a few loose stitches.
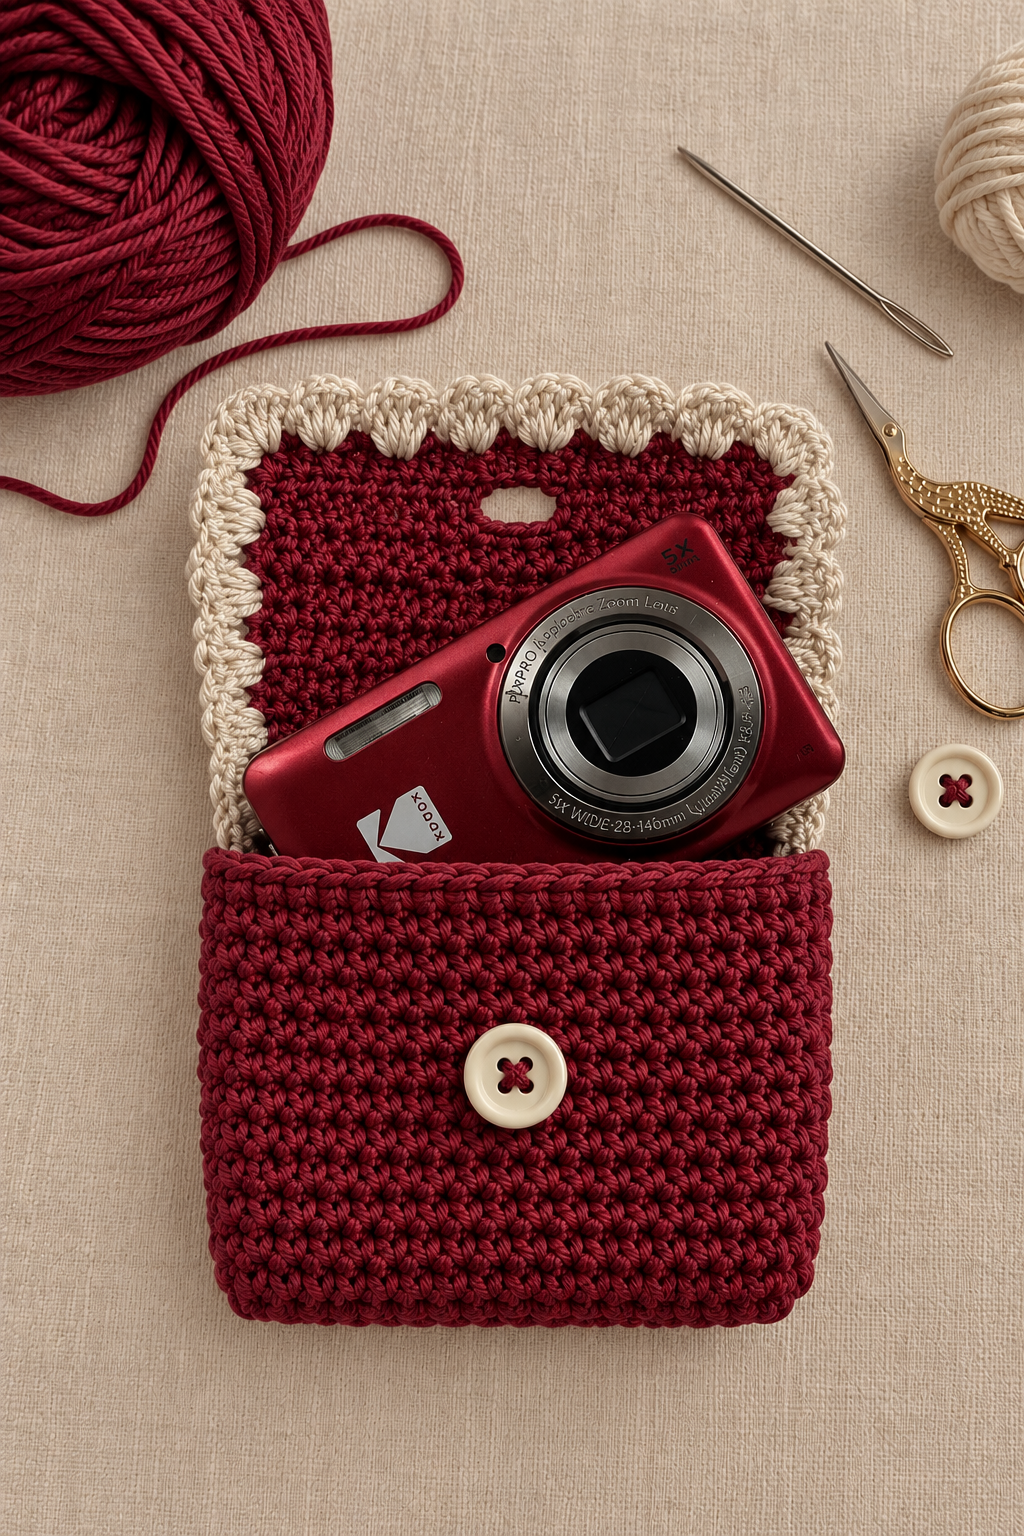
The Finished Camera Pouch
Once the border, flap, and button are complete, the pouch begins to look completely different from the simple rectangular crochet fabric used at the beginning. This is one of the most satisfying parts of making a handmade accessory.
The deep burgundy color gives the finished pouch a rich appearance, while the cream edging creates a clear visual frame. The button adds another small point of contrast and helps emphasize the handmade nature of the project.
The compact shape also makes the pouch easy to carry. Instead of looking like a purely functional protective case, it becomes an accessory that can complement a personal style.
Choosing the Best Yarn for a Camera Pouch
Yarn selection can make a significant difference in the finished result. For a pouch intended to hold a camera, consider durability and stitch definition as well as color.
Cotton Yarn
Cotton can be a good option when you want a firm, structured fabric with clearly visible stitches. It is also available in many colors, making it easy to reproduce a two-color design.
Cotton Blends
A cotton blend can provide a slightly different balance between softness, structure, and durability. The exact characteristics depend on the fiber composition.
Acrylic Yarn
Acrylic can also be used for crochet pouches and is widely available in many colors. It can produce a softer fabric and may be particularly convenient for experimenting with color combinations.
Whatever yarn you choose, make a small test swatch first. The goal is to make sure the fabric has the density and flexibility you want before committing to the complete pouch.
Color Ideas for Your Crochet Camera Case
The burgundy and cream combination shown here is elegant, but the same concept can be recreated in many different palettes.
Classic Neutrals
- Ivory and beige
- Black and cream
- Taupe and white
- Chocolate brown and natural
- Charcoal and light gray
Romantic Colors
- Burgundy and ivory
- Dusty rose and cream
- Plum and beige
- Wine red and blush
Fresh Modern Colors
- Sage green and cream
- Terracotta and natural
- Olive and ivory
- Deep teal and cream
You can also make the body and border the same color for a more minimalist appearance, or use a very bright border for a more playful accessory.
Make It Fit Your Camera Perfectly
One of the strongest reasons to crochet your own camera pouch is the ability to customize the dimensions. A commercial case is designed around a general size, while a handmade pouch can be created specifically for your device.
Before beginning, write down the camera’s width, height, and depth. Then consider how much ease you want around the camera.
If the camera has a protruding lens, grip, wrist strap, or other feature, include that when measuring. A case that fits the flat dimensions perfectly may still be too tight if the camera has additional protruding components.
Could You Use This Pouch for Something Other Than a Camera?
Absolutely. The same general pouch construction can be adapted for many small items.
- Smartphones
- Small power banks
- Wireless earbuds
- Glasses
- Makeup essentials
- Memory cards and camera accessories
- Small notebooks
- Travel accessories
- Jewelry
- Small craft supplies
This makes the project much more versatile than its name might initially suggest. Once you understand the basic construction, you can resize the idea to create a whole collection of handmade mini pouches.
Turn It Into a Small Gift
A handmade camera pouch can make a thoughtful gift for someone who enjoys photography. It can also be adapted into a general-purpose accessory pouch for someone who does not own a camera.
For a photography enthusiast, you could pair the pouch with:
- A small lens-cleaning cloth
- A memory-card holder
- A camera strap
- A small notebook for photography notes
- A handmade crochet accessory
The handmade nature of the pouch makes the gift feel much more personal than simply purchasing another generic case.
Tips for Getting a Professional Finish
Keep the Sides Straight
Pay attention to your stitch count as you work the body. Uneven increases or decreases can cause the pouch to become wider or narrower unexpectedly.
Maintain Consistent Tension
Try to keep your stitches similar in size throughout the project. Consistent tension gives the finished pouch a cleaner and more professional appearance.
Check the Flap Alignment
Before sewing on the button, close the flap and make sure it sits directly over the center of the pouch. This small adjustment can make a big difference in the finished appearance.
Secure the Button Properly
The button is not only decorative. It is part of the closure system, so make sure it is attached firmly and that the surrounding crochet fabric is not being stretched excessively.
Weave in Ends Carefully
Loose yarn tails can spoil an otherwise beautiful project. Take the time to weave them securely into the wrong side of the crochet fabric.
Should You Add a Fabric Lining?
A lining is optional. For a simple lightweight pouch, the crochet fabric alone may be enough. However, a lining can provide a smoother interior surface and can help prevent small objects from catching between crochet stitches.
If you decide to add one, choose a lightweight fabric that complements the yarn colors. A cream or burgundy lining would coordinate naturally with this particular design.
A padded lining could also be considered if the primary purpose is additional protection for a camera. However, the amount of padding should be chosen carefully so that it does not make the pouch unnecessarily bulky.
Can the Pouch Be Made Without the Decorative Border?
Yes, if you prefer a simpler appearance. The cream scalloped border is one of the defining visual features of this particular design, but the concept can be simplified.
You could finish the pouch with:
- A simple single-color edge
- A contrasting straight border
- A small scalloped edge
- A slip-stitch finish
- A different decorative crochet edging
This gives you an opportunity to create the same basic pouch shape while matching a completely different personal style.
A Great Project for Practicing Crochet Texture
The body of the pouch demonstrates how a simple stitch pattern can become visually interesting when repeated consistently. The dense burgundy fabric has enough texture to make the surface look handmade and substantial without requiring an elaborate motif.
Projects like this are useful for improving stitch consistency because the same type of stitch is repeated over a relatively large area. By the time you reach the flap, your hands will naturally become more comfortable with the rhythm of the stitch pattern.
Photography-Inspired Handmade Style
There is also something particularly charming about combining photography with crochet. Photography is often associated with technology, lenses, screens, and electronic equipment, while crochet represents traditional handmade craftsmanship.
A crochet camera pouch brings those two worlds together. The camera remains a modern piece of technology, but the accessory surrounding it is completely handmade.
That contrast is part of what makes the finished project visually interesting. The deep burgundy yarn gives the camera a warm, handcrafted setting, while the cream edging adds a soft decorative frame.
Ideas for Personalizing the Pouch
Once you have the basic construction understood, there are many ways to make your pouch unique.
Add Initials
You can embroider a small initial or monogram onto the front of the pouch. A simple contrasting yarn color can make the personalization subtle and elegant.
Change the Button
Buttons are an easy way to completely change the personality of the finished accessory. Try wooden buttons for a rustic appearance, pearl-style buttons for something more elegant, or colorful buttons for a playful look.
Add a Wrist Strap
A short crochet wrist strap can make the pouch easier to carry. Alternatively, a purchased strap can be attached if you prefer a different material.
Add a Small Charm
A tiny crochet flower, heart, star, bead, or tassel can add another decorative element. Keep the embellishment relatively small so that it does not interfere with opening the pouch or handling the camera.
Care and Maintenance
Because the pouch may come into contact with a camera, dust, and the inside of a handbag, keeping it clean is important. Follow the care instructions for the specific yarn you choose.
If the yarn is washable, gentle cleaning may be possible. Always allow the pouch to dry completely before placing the camera back inside.
Avoid placing a wet camera or damp accessory inside the pouch. The purpose of the crochet case is to provide a protective handmade layer, not to replace proper care of electronic equipment.
Frequently Asked Questions
What size camera will fit inside?
That depends on the dimensions you choose when making the pouch. The best approach is to measure your own camera before beginning and adjust the width, height, and depth of the crochet construction accordingly.
What yarn should I use?
A medium-weight cotton, cotton blend, or another durable yarn can work well. Choose a yarn that produces a firm fabric and has enough stitch definition to show the texture clearly.
Do I have to use burgundy and cream?
No. The burgundy and cream combination is simply the color palette shown in this design. You can replace both colors with your own combination.
Can I make the pouch larger?
Yes. The construction can be adapted by changing the starting dimensions and the number of rows. However, always test the fit against the object you intend to carry rather than relying only on a theoretical measurement.
Can I use this design for a phone?
Yes. The same general pouch concept can be resized for a phone, glasses, small notebook, earbuds, or other similarly shaped items.
Does the pouch need a lining?
No. A lining is optional. A dense crochet fabric can work on its own for a lightweight pouch, while a lining can be added if you want a smoother or more protective interior.
Can I change the button?
Absolutely. The button is one of the easiest elements to personalize. Just make sure the button and buttonhole are compatible in size.
Can I sell finished pouches I make?
That depends on the specific pattern or design source you are following and its stated terms. If you are using someone else’s published pattern, always check the designer’s permissions before selling finished items or using their photographs, instructions, branding, or written content.
Final Thoughts
This crochet camera pouch is a beautiful example of how a small handmade project can combine style and function. The textured burgundy body creates a sturdy-looking foundation, the cream scalloped border adds personality, and the button closure gives the pouch a classic finishing touch.
What makes this type of project particularly useful is its flexibility. You are not limited to one exact camera size or one specific color palette. Once you understand the basic construction, you can adapt the dimensions and design details to suit your own camera, phone, glasses, accessories, or other small items.
For crocheters who enjoy practical projects, this is the kind of design that can be both relaxing to make and genuinely useful after it is finished. It is also a wonderful opportunity to experiment with color combinations, buttons, edging techniques, and personalized details.
Whether you recreate the rich burgundy-and-cream look shown here or design your own version from scratch, a handmade crochet pouch can turn an everyday accessory into something much more personal.
A Small Project With Plenty of Possibilities
Start with your camera measurements, choose a durable yarn, keep your stitches consistent, and personalize the colors and closure to create a pouch that feels uniquely yours.
Design note: The project shown in this article is presented as crochet inspiration based on the photographed finished pouch and construction stages. The dimensions, yarn choice, hook size, and stitch counts should be adapted to the specific camera and materials being used. The photographs used in this article are supplied for this project and should not be treated as photographs from another designer or website.