Crochet Flower Accessory to Wear Forever
Crochet Flower Accessory You Can Wear Forever
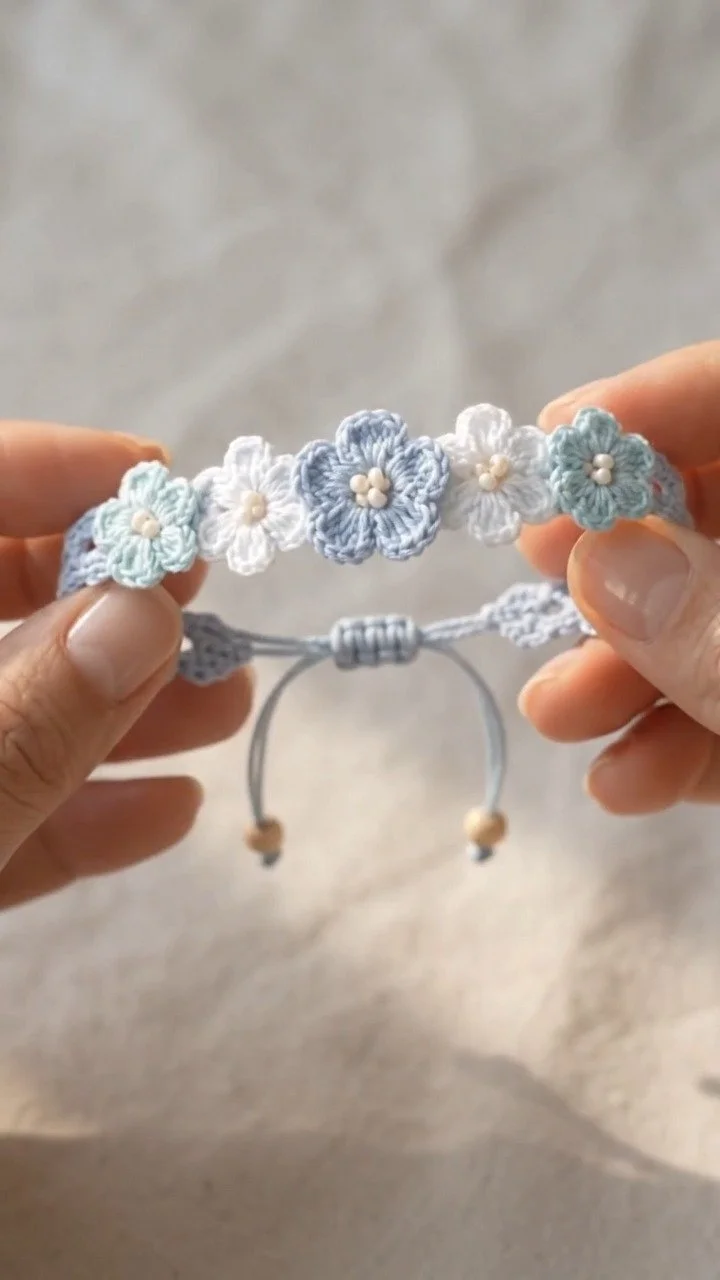
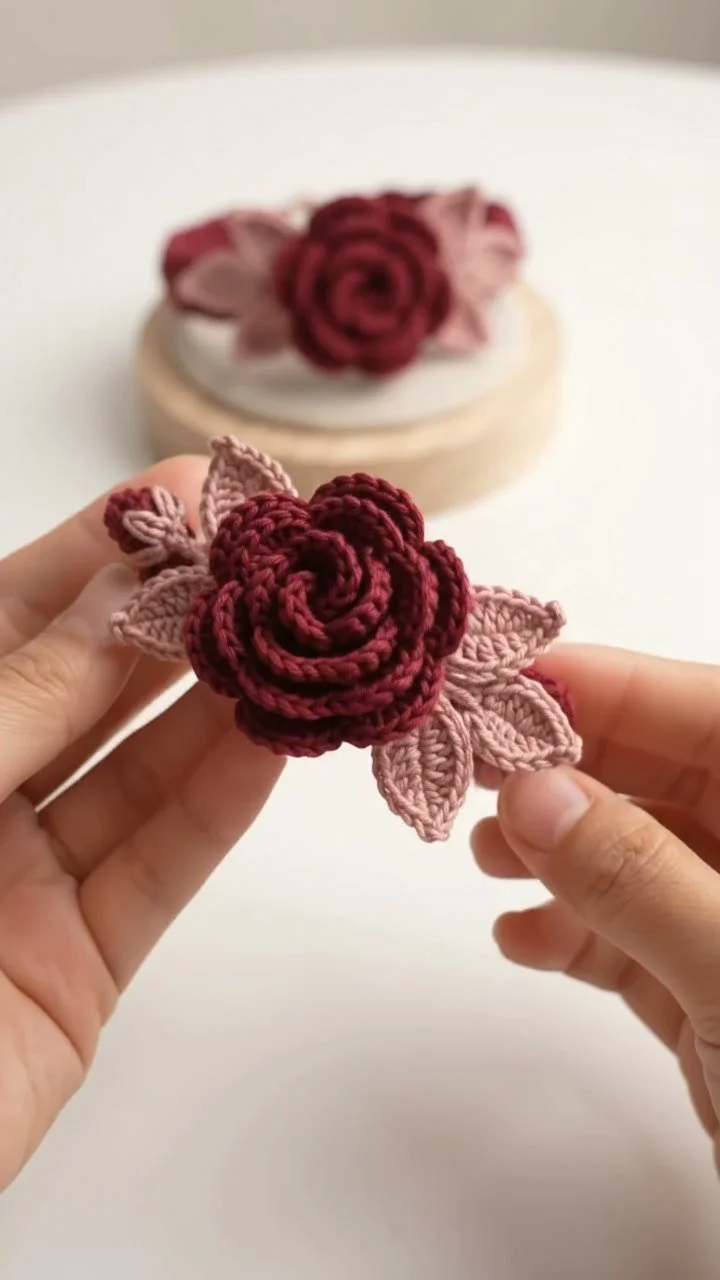
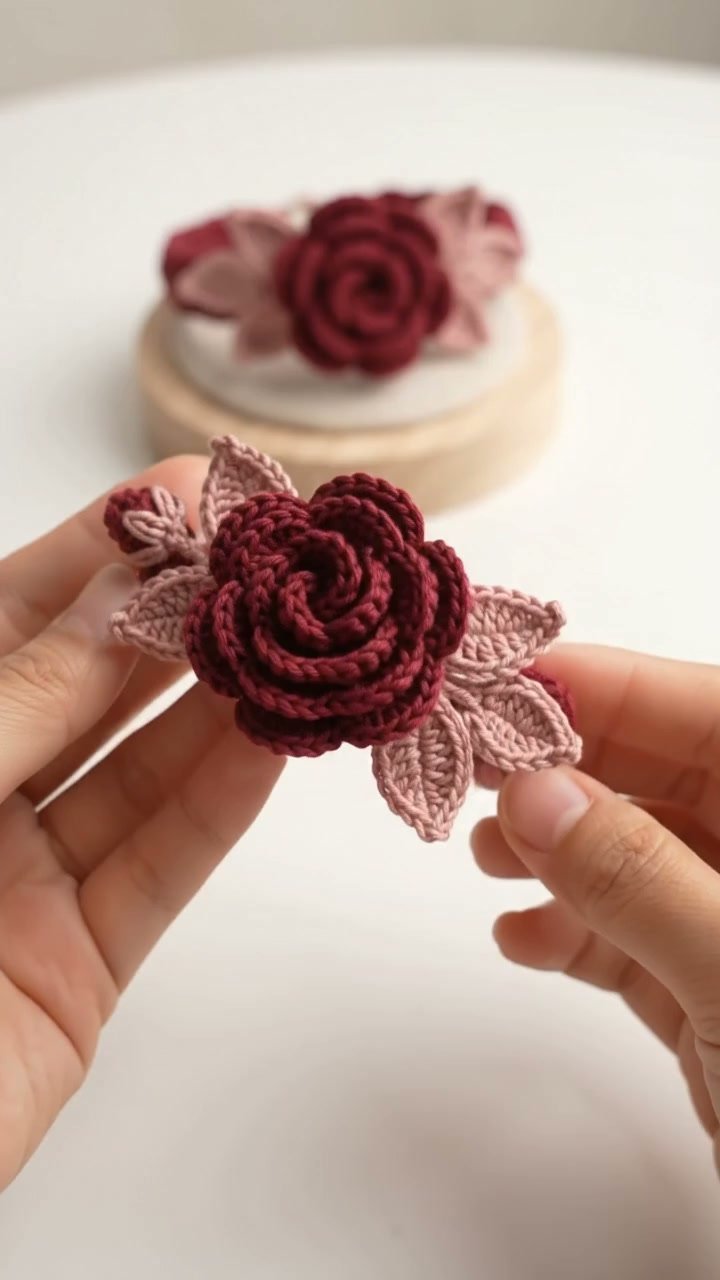
In this tutorial, we’re diving into the art of crochet to create a stunning flower accessory that you can wear as a bracelet or attach to various outfits. You’ll learn essential crochet techniques for crafting the flower petals, the center, and how to assemble everything into a gorgeous wearable piece. Let’s get started on this enjoyable project!
Project Plan
This project includes three main components:
- Crochet Flower Petals – These are the main decorative elements.
- Central Part of the Flower – This provides the finishing touch to the flower design.
- Bracelet Base – A simple foundation where the flower will be attached.
Assembly Order
- Crochet the petals.
- Create the center of the flower.
- Join the petals to the center.
- Attach the completed flower to the bracelet base.
Materials and Tool Selection
Materials
- Yarn: A medium-weight cotton yarn is ideal for this project due to its durability and comfort. Cotton is also great for wearables since it can be washed without losing its shape.
- Crochet Hook: Generally, a G (4.0 mm) hook works well with medium-weight yarn, but you should confirm by testing a gauge swatch.
- Scissors: For trimming yarn ends neatly.
- Tapestry Needle: To weave in ends and secure pieces together.
- Bracelet Base: Choose a simple metal or fabric band that will comfortably fit your wrist and securely hold the flower.
Suggested Choices
- Color Options: Selecting two contrasting or complementary yarn colors can improve the flower’s visual appeal.
- Yarn Thickness: While we recommend a worsted weight yarn, you can experiment with thinner or thicker options based on personal preference.
Making a Sample
Before starting on your main project, crochet a small swatch using the same yarn and hook combination to ensure you’re achieving the correct gauge. Aim for about 4 stitches per inch. If your gauge does not match, adjust your hook size accordingly.
Terminology and Techniques
We will use the following crochet abbreviations throughout this tutorial:
- ch: chain
- sc: single crochet
- dc: double crochet
- sl st: slip stitch
- st(s): stitch(es)
Basic Technique Instructions
Chain (ch)
- Make a loop with the yarn.
- Pull the working yarn through the loop to form a base knot.
- Pull the working yarn through the loop to create a chain.
Single Crochet (sc)
- Insert the hook into the stitch of the previous row from front to back.
- Catch the yarn with the hook (2 loops on the hook).
- Pull the yarn through both loops to complete the single crochet.
Double Crochet (dc)
- Yarn over before inserting the hook into the next stitch.
- Catch the yarn and pull through (you will have 3 loops on the hook).
- Yarn over and pull through the first two loops (2 loops remaining).
- Yarn over again and pull through the remaining loops to complete the stitch.
Joining (sl st)
- Insert the hook into the desired stitch.
- Yarn over and pull through, then pull that yarn through the loop on your hook to finish with no loops remaining.
Measurements and Preparation
Measure the diameter of the bracelet base to ensure your flower will be proportionate when attached. To ensure accuracy:
- Swatch Preparation: Create a 4-inch swatch, then count stitches and rows. If your swatch differs from your goal, adjust your crochet hook size.
- Washing and Blocking: Always wash and block your swatch according to the yarn’s specifications to confirm it holds its shape.
Detailed Working Method
Step 1: Crochet the Petals
- Magic Ring: Begin with a magic ring to avoid gaps at the center.
- Round 1: Ch 3 (counts as the first dc) and work 11 dc into the ring. Pull the tail to close, and connect with a sl st at the top of the initial ch 3. (Total: 12 dc)
- Round 2: Ch 2 (counts as first hdc) and work 1 hdc in the next st, then 2 hdc in each of the next 10 sts, resulting in 22 hdc. Join with a sl st at the top of the first ch 2.
Step 2: Create the Center of the Flower
- Magic Ring Again: Use a contrasting yarn for the center.
- Round 1: 6 sc into the magic ring, pull to close, and join with a sl st.
- Round 2: Ch 1, work 1 sc in each st around (6 stitches total).
Step 3: Assemble the Flower
- Attach the Petals: Position the petals around the center piece and secure them using slip stitches.
- Check Alignment: Make sure the petals lay flat and don’t overlap excessively.
Step 4: Attach the Flower to the Bracelet Base
- Positioning: Center the flower on the bracelet base where you prefer.
- Secure with Stitches: Use your tapestry needle and thread to sew through each petal to the bracelet base, ensuring it is firmly attached.
Assembly and Finishing
- Weaving in Ends: Use the tapestry needle to weave in any loose ends, creating a neat finish.
- Check Alignment: Before securing everything permanently, make sure all parts are aligned correctly.
Troubleshooting
| Symptom | Likely Cause | Practical Correction |
|——————-|———————————————-|————————————————–|
| Flower flops | Too few stitches in flower center | Add more stitches to the center section |
| Petals uneven | Varied tension in stitches | Review your tension and practice consistency |
| Bracelet too tight| Incorrect gauge, possibly from a wrong hook | Adjust yarn choice or crochet hook size |
Variations, Care, and FAQ
Variations
- Size: Adjust the number of stitches to create larger or smaller flowers.
- Color: Experiment with different yarn colors for seasonal changes or personal styles.
Care Instructions
- Hand wash your creation, reshape if necessary, and air dry to maintain its structure. Avoid harsh detergents to prolong its life.
FAQs
-
Can I use other yarn types?
- Yes, adapt the hook size accordingly to achieve the desired gauge.
-
How can I secure the flower if it gets loose?
- Ensure tight sewing to the bracelet base, and consider using fabric glue for reinforcement.
-
Will it hold up in daily wear?
- Definitely! Cotton yarn is both durable and washable.
-
Can I make a hair clip instead?
- Absolutely! Simply attach the flower to a hair clip using the same assembly techniques.
Completion Checklist
- [ ] Complete crochet flower and center assembly.
- [ ] Attach securely to the bracelet base.
- [ ] Weave in all ends.
- [ ] Block the finished piece if needed.
By following these detailed instructions, you will create a beautiful, wearable crochet flower accessory that reflects your crafting prowess. Happy crocheting!